June 25, 2009

Banana Bread for Comfort {Naptime Everyday}

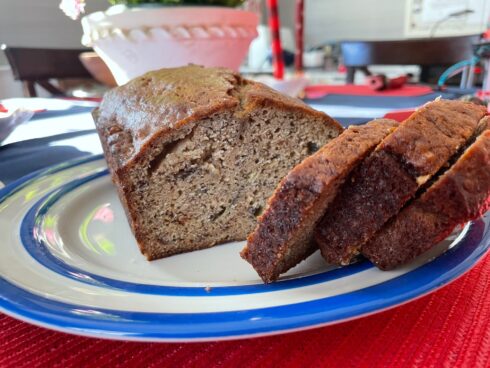
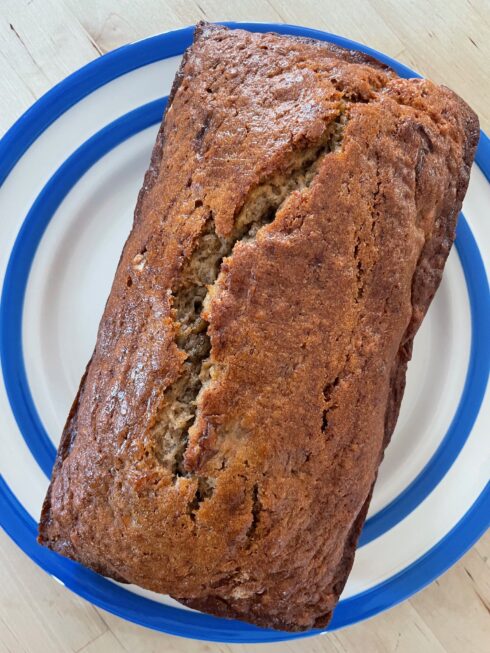
Homemade Banana Bread Recipe

There is nothing quite like homemade banana bread to soothe my nerves. No matter the situation, one bite of mom’s bread and all my concerns melt away for a few blissful moments. In fact, this bread has such power over me that while I was primping for my wedding ceremony, my brother slipped me a few slices. It was a clever move on his part. Casually snacking on my favorite food was the perfect way to calm my jitters, ensuring I wouldn’t faint dead away during my vows (I didn’t).

Homemade Banana Bread
Luckily for me, my mother wrote her banana bread recipe on a card with her name on top, “Carla’s Kitchen”, and gave it to me when I moved to New York. Since then I have been baking it regularly – as evidenced by the stockpile of bananas in my freezer – and it was even one of my daughter’s first solid foods. Of course, like any good home baker, I am always happy to entertain new variations of homemade banana bread recipes. I have tried dozens over the years, even tucking a few into my permanent recipe binder. You might remember that last winter I shared one of Molly’s favorite banana bread recipes, when I reviewed her book. I love her method and have made it several times since. However, no matter how interesting or unique the variation, Mom’s homestyle version is still my top choice.

I love Naptime Chef-ing homemade banana bread for many reasons, not the least of which are that the batter is a snap to prepare, and the final product guarantees several days of snacking pleasure. Even just being in my apartment while it bakes is a treat in itself. I am always seduced by the aroma of warm banana and sweet spices that wafts through our home, making the process of letting it cool before I dig in an exercise in self-restraint. Sometimes I add chocolate chips as a treat, which adds another delicious element to the sweet fragrance. In my opinion the best thing about this bread is it’s genuine banana flavor. It is neat and clean, unadulterated by overwhelming spices or additional ingredients. Instead, the cinnamon and nutmeg gently highlight the fresh banana flavor without muddling it up. This bread is perfect for children, as well. Even though my daughter can’t articulate her feelings yet, by the way she devours slice after slice, I can already see that it has become a favorite of hers, too.

Print

Homemade Banana Bread

A delicious recipe for classic homemade banana bread from my mother and grandmother
Course Snack
Prep Time 15 minutes
Cook Time 40 minutes
Servings 1 loaf

Ingredients

  • 8 Tablespoons unsalted butter
  • 1 cup granulated sugar
  • 2 large eggs
  • 1 teaspoon good vanilla extract
  • 3 ripe bananas
  • 2 cups all-purpose flour
  • 1 teaspoon baking soda
  • 1/2 teaspoon nutmeg
  • 1 teaspoon ground cinnamon
  • 3/4 cup mini chocolate chips (optional)

Instructions

  • Preheat oven to 350. Butter and flour a standard 9x5 loaf pan*.
  • Mix together butter and sugar until fully combined. Add eggs and vanilla extract, mix well. Add mashed bananas, mix again until completely combined.
  • In a separate bowl mix flour, soda, nutmeg, cinnamon and chocolate chips. Stir this mixture a few times and make sure the chips are fully coated with flour.
  •  Working slowly, stir flour mixture into egg mixture. Keep stirring until all flour is fully incorporated. The batter may still be a little lumpy from the bananas, this is normal.
  • Pour batter into prepared loaf pan. Bake for 45 - 50 minutes or until top is golden and a cake tester comes out clean.
  • Cool in the pan for 10 minutes. Then, carefully remove it from the pan and let it cool on a wire rack before serving.*You can also divide the batter into smaller loaf pans, or mini loaf pans if you want to make smaller breads

Notes

Freezer Tips: This bread freezes well. If you want to save it for later simply wrap it tightly in plastic wrap. Then wrap it again with an outer layer of aluminum foil. Make sure none of the bread is exposed to air. It will last in the freezer for 2-4 months.
June 24, 2009

Gingersnap Ice-Cream {Powernap}

Christmas in June? I hope not – though with the weather in NYC lately anything is possible. Either way, this sweet and spicy Gingersnap Ice Cream is the perfect way to enjoy the flavors of the holidays in summer style. After making this you will agree, there is no reason the classic flavor of gingersnaps needs to be confined to the winter months. Simply crank up the ice-cream maker and enjoy! Like your ice-cream extra spicy? Be sure to read the notes at the bottom, they indicate how to turn up the heat. If you think you can handle it.

Recipe

Nicole’s Gingersnap Ice Cream

Ingredients

2 egg yolks
1 cup whole milk
1 cup heavy cream
2 T. molasses
½ cup sugar
1 T. ground ginger
2 t. cinnamon
2 dashes of nutmeg

Instructions

1. Combine milk and heavy cream in a large saucepan and bring to a low boil. Add molasses, and stir to incorporate. In a separate bowl, whisk egg yolks, sugar, and spices. Add one cup of hot milk mixture to egg mixture, stirring constantly. Add remaining milk mixture to eggs, then pour full mixture back into sauce pan and cook over low heat, stirring constantly, until mixture coats the back of a spoon – about 5 minutes.

2. Pour mixture into clean glass bowl and refrigerate for a minimum of 4 hours, and/or up to overnight.

3. Pour mixture into ice cream maker and follow manufacturer’s instructions on time. Scoop into container and freeze for a minimum of two hours.

Note: This recipe has an intense ginger flavor at first taste. If left up to one day in freezer, the taste mellows slightly. You can adjust ginger ratio down to make it more mild – or, if you are like my husband and like your gingersnaps as spicy as possible, you can add crystallized ginger or crushed gingersnap cookies to the mixture – after the ice cream maker, before the freezer!

Additional note: this mixture makes a softer, creamier ice cream than some of the others, so does not require any time out of the freezer before serving.

Naptime Notes

Naptime Recipe Serving ideas

Naptime Stopwatch

Naptime Reviews

June 23, 2009

Browned Butter Asparagus Risotto {Naptime Everyday}

I am not the kind of person who spends much time worrying about being trendy. I don’t replace my entire wardrobe seasonally, redecorate my house yearly, or choose vacation destinations based on their celebrity quotient. Instead, I like to feel out the latest trends before I invest my time or money. Some fads come and go in a blink, while others become mainstays that are worth getting to know. This recently happened with the food trend of browned butter, which is regular butter that is toasted until it becomes golden brown and adopts a warm nutty taste. A few years ago most home cooks had no idea what it was, but these days it is all the rage.

I’ll be the first admit that I did not initially embrace the concept of browned butter. I simply didn’t understand how or why browned butter could really change the flavor of a dish. In fact, I don’t think I would ever have started cooking with it had it not been for my mother-in-law’s browned butter sage sauce. She served it over chicken last fall and, after one bite of the warm almost almond-like flavor, I was hooked. I started searching for recipes with browned butter and made several interesting discoveries, including one from Cook’s Illustrated which cited browned butter as the key ingredient in their best-ever chocolate chip cookies. In keeping with this trend, last month’s Vogue featured an article by Jeffrey Steingarten devoted entirely to the unique taste of browned butter, chiding us all for not seeing it’s benefits earlier.


I knew my conversion to being a browned butter-devotee was complete when it became my go-to method for all of my favorite homemade risotto recipes. Risotto has always been a big family favorite of ours, and now it is even more so. When risotto is prepared with browned butter, it’s normally light creamy flavor gets deeper and richer. The toasted butter adds a whole new dimension, it’s nutty flavor seems to enhance the dish’s rich earthy chicken and vegetable flavors.

Cooking my go-to recipe for Browned Butter Asparagus Risotto is fairly simple. To save myself time in the evening, during my daughter’s afternoon naptime I begin my meal preparation by chopping the onion, blanching the asparagus and preparing chicken stock. This way, when it comes to dinnertime, making the risotto is merely a matter of combining the ingredients and stirring lazily with my wooden spoon. To add salt to this particular meal I like to make baked prosciutto “chips,” these lend the toothsome rice a nice light crunch. I know that in my household browned butter is here to stay, and, I think, after you try this recipe you will agree. Browned butter is no longer a trend, it is a classic.

Recipe

Naptime’s Browned Butter Asparagus Risotto

adapted from recipes by Giade de Laurentiis and Mario Batali

Ingredients

1 lb. fresh asparagus, blanched and cut into 2 inch pieces
5 T. unsalted butter, room temperature
medium onion, finely chopped
1 ½ c. Arborio rice
½ c. white wine
4 c. chicken stock (I use Knorr bouillon cubes when I don’t have homemade stock on hand)
½ c. fresh grated parmesan

Instructions

1. In a wide saucepan, I usually use my Dutch oven, heat the butter over medium heat. Allow the butter to warm until it turns a warm, golden brown and has a nutty fragrance. About 1 ½ to 2 minutes.
2. Add onion and saute until translucent. About 4 minutes.
3. Add rice and stir until it is coated with the butter and well-mixed with the onion. Then, add the wine and deglaze the bottom of the pan, scraping up any browned bits.
4. Simmer until the wine has completely evaporated. Then, add ½ c. of the chicken stock and stir until it is completely absorbed. Continue adding the chicken stock by ½ c. until it absorbed. About 10 minutes.
5. Once all the chicken stock has been added, cook until the rice is tender to the bite. About 5 minutes.
6. Remove risotto from heat and add remaining parmesan and butter. Stir until completely absorbed.
7. Finally, add the asparagus pieces, stirring into the risotto. Break prosciutto pieces over rice and serve.

Naptime Notes

Naptime Recipe Serving ideas

This is a delicious recipe that is flexible in every way. If you would rather make it with vegetable stock, go right ahead. Or, if you’d rather use mushrooms or peas instead of asparagus, that is fine, too.

Naptime Stopwatch

Pre-chopping the onions and blanching the asparagus saves a lot of time when assembling the meal in the evening. This way, the total assembly in the evening is about 30 minutes, maximum.

Naptime Reviews

Adults and children alike love risotto, including mine. It is soft enough for my toddler to chew, but sophisticated all of us for dinner.

June 22, 2009

Cardamom-Saffron Macaroons {Powernap}


I was thrilled when Monica Bhide, the present-day authority on contemporary Indian cooking, gave me the opportunity to participate in a “virtual potluck dinner” celebrating the launch of her new cookbook, Modern Spice. I have been a longtime fan of her work and am always eager to cook from her repertoire, the recipes never disappoint.

Since I do most of my cooking and baking while my daughter naps, it was ideal when Monica asked me to bake a batch of her Saffron-Cardamom Macaroons. They are chic enough for any dinner party, humble enough to serve at home, and easy to prepare ahead of time. As expected, preparing them was a snap. I simply whipped the egg whites, added a pinch of salt so they would hold their peaks, and folded them into the coconut mixture. I will admit, however, that I did take a small detour with my ingredients. Per Monica’s suggestion, I chose to add a dash of cinnamon to my batter, since it is my favorite spice.

Once the baking was completed I let the macaroons cool before consumption. I should let you know that this process – letting them cool before eating – was extremely difficult. When they had been baking, my apartment had filled with the mouth-watering aroma of toasting coconut and warm nutty spices. I couldn’t wait to dig in. After what felt like hours (it was, in fact, minutes) I finally took my first bite and was immediately transported. The unusual combination of saffron, cardamom and cinnamon woven with sweet coconut created a delicious layer of flavors that was bold, but not overwhelming. Unlike most macaroons I eat, these were neither too overly sweet or sticky. Instead, they had an amazing depth of flavor with a light, flaky texture, and were perfect to enjoy while I sipped my cup of tea.

I’ll admit that I ate several macaroons in one sitting and, later, my husband did, too. He even agreed that I should start experimenting with the jars on my lazy susan to come up with new macaroon flavors based on Monica’s recipe. I can’t wait to get started. In the mean time, I will be making this recipe again shortly. I am hosting a dinner party soon, and am serving these for dessert.

Order your own copy of Modern Spice HERE!:

Recipe

Saffron-Cardamom Macaroons
reprinted with permission from Modern Spice, by Monica Bhide

Ingredients

4-ounce package shredded sweetened coconut
10 ounces sweetened condensed milk such as Eagle brand, from a 14-ounce can
1 ½ teaspoons ground cardamom
1 teaspoon saffron threads, crushed
¼ teaspoon table salt
2 small egg whites, whipped to peaks (see Notes)

Instructions

1. Heat the oven to 350°F. Prepare a baking sheet by lining it with parchment paper and lightly spraying with nonstick spray.
2. Combine the coconut, condensed milk, cardamom, saffron, and salt in a bowl. (It will form a mixture that is not like typical cookie dough, but once the egg whites are folded in, the mixture will hold together.)
3. Gently fold in the whipped egg whites.
4. Using a spoon, mold the mixture into tablespoon-size balls and place 1 inch apart on the prepared pan.
5. Bake the macaroons for 14 to 16 minutes, until the exterior is very slightly brown, the middle is still soft, and the bottoms are beginning to turn golden brown.
6. Remove from the oven. Allow to cool for about 20 minutes.
7. Serve at room temperature. These can be stored in an airtight container for up to a week.

Notes: Don’t use wax paper when baking; it will smoke in the oven. Parchment paper works best. Use room-temperature eggs. I like to add a touch of lemon juice, salt, or cream of tartarto help the eggs get the peaks. Once you begin to whisk them and they reach the soft peak stage, stop. If you continue to beat them, the proteins will break down and you will have a soft mess on your hands.

Naptime Notes

Naptime Recipe Serving ideas

Naptime Stopwatch

Naptime Reviews

More Naptime Recipes

June 20, 2009

Pineapple Mint Sorbet {Powernap}

Nicole and I believe that variety is the spice of life, which is why we agree it is a good idea to include sorbet recipes in TNCGICF. I mean, almost everyone we know loves sorbet just as much as ice-cream, and sometimes even more. This recipe for pineapple mint sorbet was inspired by the fresh mint in Nicole’s garden. We love this combination of flavors, the cool mint with the sweet pineapple makes for a refreshing summer dessert any day of the week.

Recipe

Nicole’s Pineapple Mint Sorbet

Ingredients

1 fresh, whole pineapple
¾ c. sugar
2 T. corn syrup
2 c. water
10-14 Peppermint Leaves, torn

Instructions

1. Cut and core pineapple into chunks. Mix pineapple pieces with ½ cup of sugar, and refrigerate for a minimum of 1 hour (3 hours is preferable).
2. In a medium saucepan, bring water and corn syrup to a slow boil. Add remaining ¼ cup of sugar, and the mint leaves. Stir while sugar dissolves, then turn off light, cover, and let the syrup mixture sit on stove for 1 hour. After one hour, pour mixture through a sieve to remove mint leaves, and chill syrup in refrigerator for the remaining 2 hours.
3. Remove pineapple and pulse in blender until smooth (can be left somewhat chunky, if this is your preference). Mix pureed pineapple and syrup together to combine well, then mix in ice cream maker according to manufacturers instructions.
4. Chill in freezer for 4 hours, or overnight.

Naptime Notes

Naptime Recipe Serving ideas

Naptime Stopwatch

Naptime Reviews

June 18, 2009

Neiman’s Chocolate Chip Oatmeal Cookies {Naptime Everyday}

If the world fell apart I am pretty sure I would be alright as long as I had my family, and chocolate chip cookies. It is a well known fact amongst my family and friends that I am a total snob when it comes the most classic cookie flavor known to man. In fact, my ever-expanding recipe binder has a special section – equal in size to the “pasta” chapter – devoted entirely to chocolate chip cookie recipes. I take no small amount of pride in this well-edited recipe collection. After all, I am a ruthless taste-tester, having spent years studying how the perfect combination of butter and chocolate should melt in my mouth. Of course, like any good collector, I am always open to trying new recipes that come my way. But, if the end results is not up to snuff, the recipe tossed in the garbage. Permanently.


I chose to make my Neiman-Marcus Chocolate Chip Cookie recipe last week because I needed a big batch of delicious cookies, fast. Like most people I know, I received a version of this recipe from a forwarded email several years ago. The note included a lengthy urban myth about a woman’s revenge at being charged $250 at Neiman’s, for a recipe she thought she was receiving for free. Thus, she circulated the recipe as widely as possible via the internet, to ensure nobody would ever have to pay for the recipe again. Of course, it is widely acknowledged that this story is complete fiction, there is not one ounce of truth in it. But, urban myth or not, I baked a batch just to see what they were like, and am still making them today.


My favorite part about the taste of these cookies is that the texture is unlike any other I’ve tried. This comes from unusual addition of blended oatmeal. Instead of calling for whole flakes of oatmeal, like we normally eat at breakfast, this recipe instructs that the grains be ground into a fine powder. The result is nothing short of genius. The blended oatmeal imbues the cookies with a sweet nutty flavor, but avoids giving them the dry crumbly texture usually associated with oatmeal-laden cookies. The shredded Hershey bar also creates an unexpected twist. The thin milk-chocolate flakes melt into the dough while baking, creating a subtle chocolate flavor that isn’t overwhelming.

Making these cookies during my daughter’s afternoon naptime is a cinch. The best part for her is that when she wakes up our home smells like her favorite bakery, and I let her enjoy a cookie for her afternoon snack. In the end, I doubt any of us will ever learn the true origins of the faux Neiman-Marcus Chocolate Chip Cookie recipe. But, the truth doesn’t really matter to me. This recipe has earned a permanent spot in my binder. Which is right where it belongs.

Recipe

Naptime’s Chocolate-Chip Oatmeal Cookies

adapted from the faux Neiman-Marcus Cookie recipe, made popular by urban legend

Ingredients

4 sticks unsalted butter, room temperature
2 c. sugar
2 c. dark brown sugar
4 eggs
2 t. good vanilla extract
5 c. blended oatmeal* (use Regular Oatmeal, not instant)
4 c. all-purpose flour
2 t. baking soda
2 t. baking powder
1 t. Kosher salt
1 7 oz. Hershey bar, shredded (I put it in the food processor)
2 c. chopped walnuts (optional)

Dough Tips: If you want a smaller batch you can easily halve this recipe. Or, you can prepare the full recipe and freeze half the dough, tightly wrapped in plastic, to bake at another time.

*To make blended oatmeal, put it in your food processor and pulse until it is a fine powder.

Instructions

1. Preheat oven to 375. Prepare baking sheets with Silpat or parchment paper.
2. Prepare blended oatmeal.
3. In a large bowl add blended oatmeal, flour, salt, baking powder and baking soda. Stir and set aside.
4. In a mixer fitted with a paddle attachment, cream together butter and sugars until light and airy. Add eggs and vanilla and mix well.
5. Add flour mixture to sugar mixture and incorporate.
6. Prepare Hershey bar by shredding it in the food processor. Add to dough in the mixer.
7. Gently pour chocolate chips into the dough. Mix to incorporate.
** If possible, let dough rest in the refrigerator for at least 6 hours before baking.
8. To bake, roll dough into 1 inch round balls and place, two inches apart, on cookie sheets. Bake at 375 for 10-12 minutes. Cool and serve.

Naptime Notes

Naptime Recipe Serving ideas

The blended oatmeal and shredded chocolate give this cookie a unique twist with both flavor and texture. It is easy to complete during naptime, and perfect for when you need a big batch of cookies to serve to a crowd, or for a bake sale.

Naptime Stopwatch

Preparing the dough takes about 15 minutes. I usually let the dough rest and do my baking after my daughter goes to sleep.

Naptime Reviews

These cookies are heavy on the butter which keeps them thin and crispy. Everyone loves them, especially when I serve them alongside a big bowl of vanilla ice-cream.

June 17, 2009

Malted Milk Ice-Cream {Powernap}

Malted milk is a classic flavor which conjures up images of ice-cream parlors and poodle skirts for many. While malt powder is somewhat out of vogue these days, my family still adores it. We always have a container of it in the cupboard, Ovaltine being our preferred brand of choice. This ice-cream flavor brings me straight back to the days of ordering chocolate malt shakes with my Dad at Red Nugget Ice-Cream in Cooperstown. I hope it brings back happy memories for you, as well.

Recipe

Naptime’s Chocolate Malted Milk Ice-Cream

adapted from The Perfect Scoop by David Leibovitz

Ingredients

1 c. half and half
2 c. heavy cream
2/3 c. sugar
½ t. coarse salt
½ t. vanilla extract
2/3 c. malt powder (Carnation, Ovaltine & Horlick’s are all popular brands)
2 squares unsweetened chocolate* (I use Ghiradelli)
5 large egg yolks
1 ¾ c. malted milk balls, coarsely chopped
*Note: If you want regular malted milk ice-cream, do not add the melted chocolate.

Instructions

1. Coarsely chop malted milk balls, then place in the freezer.

2. Bring half and half, and heavy cream to a boil in a large saucepan. In a microwave melt the chocolate squares and set aside to cool. In a separate bowl, whisk the egg together with the sugar and salt, until thick and well mixed. Add melted chocolate and mix until well incorporated. Once the liquid has come to a boil, lower light, and add a scant half a cup of liquid into the egg mixture to temper the eggs. Gradually add the remaining hot liquid into the egg/sugar mixture, while continuing to stir. Once all liquid has been added, mix well. Pour the incorporated mixture back into the saucepan and cook over a medium low heat, stirring continuously. Do not let mixture come to a boil!

3. Once custard thickens (enough to coat the back of the spoon), remove pan from heat and pour over a strainer into a heatproof bowl. Mix in vanilla extract. Refrigerate the custard for 4-6 hours, or overnight.

4. Scrape the chilled custard into your ice cream maker and churn according to manufacturer’s instructions. By hand, add the chopped milk balls, and mix to incorporate throughout frozen custard. Pack ice cream into a container and freeze for a minimum of 2 hours. Note: if you freeze the ice cream for a night before use, ice cream will be very dense. Remove 10-15 minutes before you wish to serve.

Naptime Notes

Naptime Recipe Serving ideas

Naptime Stopwatch

Naptime Reviews