April 1, 2010

Linzer Cookies for Easter {Naptime Everyday}

What’s Going on Today: Visiting a friend in upstate New York, major arts and crafts projects with kids!
Naptime Goals: Relaxing with good friends while the kids nap, making cookie dough to prepare for decorating Linzer cookies.
Tonight’s Menu: Baked Chicken, Creamy Polenta, Carrot Souffle, Easter Linzer cookies.
Parenting Lesson of the Day: Sleepovers are so much fun, no matter how old you get!

This year we won’t have a big Easter celebration since we’ll just have returned from traveling, but that hasn’t deterred us from undertaking a few holiday related projects this month. When we were visiting our friends in upstate New York last week the other Mom and I decided it would be fun to bake some cookies with the girls. Ever the fans of baking projects – any chance to eat cookie dough (!) – the girls completely agreed.

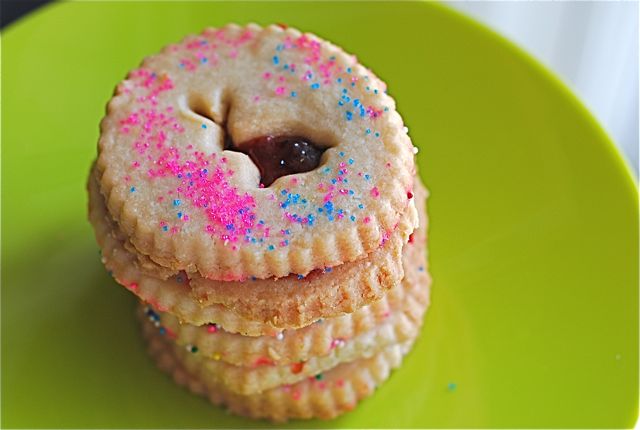
Since they both still nap in the afternoon it was easy for us to set up the project. We simply prepared the dough in mid-afternoon and cut out the shapes with the cookie cutters. Then, we set out some fun sprinkles and let them go to town decorating when they woke up. You should have seen the mess on the kitchen floor! After the cookies had baked and cooled they finishing them by spreading the jam on – rather sloppily – and placing the cut-out cookie on top.

To play up the Easter theme we used a mini bunny cookie cutter instead of the usual smaller circle. It was a cute way to give our favorite jam cookies a holiday twist. Needless to say, holding the girls back from eating more than one before dinner was quite tough. However, in typical kid fashion, the cookies were the perfect incentive to get them to clean their plates!

Best wishes to everyone for a fun, family holiday this weekend!

Recipe

Linzer Cookies for Easter

adapted from Barefoot Contessa

Ingredients

  • Confectioners’ sugar or Sprinkles, for dusting
  • ¾ lb. unsalted butter, room temperature
    1 c. granulated sugar
    1 t. good quality vanilla extract
    3 ½ c. all-purpose flour
    1 t. lemon zest (use Meyer if possible)
    ½ t. Kosher salt
    ¾ c. Raspberry preserves or any homemade jam

    Instructions

    1. Preheat oven to 350ºF. Line two baking sheets with parchment paper or Silpat.
    2. Sift together flour and salt in a bowl and set aside.
    3. In a mix cream the butter and sugar until totally combined. Then, add the vanilla and lemon zest, mix again. With the mixer on low, add in the flour/salt mixture until the dough comes together. Do not overbeat. Wrap in plastic and chill for 30 minutes.
    4. Place the dough on a floured surface and roll out until ¼ inch thick. Cut out rounds in a 3 inch round cookie cutter. With ½ of the rounds, cut out a smaller shape – like an easter bunny or similar. Use extra dough to form a few more cookies. Place all cookies on the cookies sheets and bake for 20-25 minutes.
    5. Allow cookies to cool to room temperature. Then, spread raspberry preserves on the bottom cookie and place the cut-out cookie on top. Dust the top of cookies with confectioners’ sugar.

    Naptime Notes

    Naptime Recipe Serving ideas

    Instead of confectioners’ sugar the kids love decorating with sprinkles, feel free to do the same. Also, instead of lemon zest you could use orange zest, and feel free to use another flavored jam if you prefer.

    Naptime Stopwatch

    Making the dough takes about 10 minutes, then baking and assembling the cookies takes around 30 minutes (or longer with kids!)

    Naptime Reviews

    Jam sandwich cookies are fantastic for families or serving at more formal teas. I think I might try my homemade Apricot Jam in these this summer.

    March 30, 2010

    Chicken Parmesan, My Way {Webisode #18}

    What’s Going on Today: Last minute errands – pharmacy, travel shop, dry cleaner, etc. – before we head out to Charleston!
    Naptime Goals: Prepare Chicken Parmesan for dinner, finish packing suitcase.
    Tonight’s Menu: Chicken Parmesan, Green Salad, Garlic Bread.
    Parenting Lesson of the Day: Create a “grab bag” of new toys from the dollar store to keep kiddos entertained when traveling!

    We never grow tired of Chicken Parmesan. It’s one of those things I always keep in my regular rotation, like this or that. A lot of foodies might not consider Chicken Parmesan to be a particular gourmet dish, but I beg to differ. When done correctly this dish exudes flavor, warmth and comfort in each bite.

    All too often restaurants serve Chicken Parmesan in an overwhelming heap of red sauce, melted cheese and overly breaded chicken. When done this way the chicken ends up dry and overworked, instead of being tender and succulent like I think it should be.

    As you’ll see here, I prefer to approach this dish with a lighter touch. I pound the chicken into submission (OK, that’s not so light, but you get the idea) until the meat is nice and tender. Then, I bread it with panko crumbs and parmesan cheese for a light crunch and intense flavor. You’ll notice that my breading technique is not particularly high tech, I don’t invest in anything crazy such as special breading trays or the like. Instead, I keep it simple with a bowl for the eggs and plates for the flour, cheese and breadcrumbs.

    Finally, I layer the chicken in my baking platter and pour in some homemade marinara and a light sprinkling of mozzarella. I don’t like to overdo it with the cheese, there is already Parmesan in the breading, giving it great flavor to begin with. Then, I simply refrigerate it for the afternoon while we go off to do other things.

    This is really is a great dish to make during naptime and I think you’ll agree. The only effort required in the evening is slipping it into the oven to bake and boiling up some fresh pasta and a fresh loaf of garlic bread. And, voila, a tender and flavorful Chicken Parmesan is served!

    Recipe

    Chicken Parmesan, My Way

    Ingredients

    Serves 4

    4 8 oz. chicken breasts
    2 eggs, lightly beaten
    1 c. all-purpose flour
    1 c. freshly grated Parmesan cheese
    1 ½ c. panko bread crumbs
    1 T. Kosher salt
    2 t. freshly ground black pepper
    2 T. olive oil
    16 oz. marinara sauce – homemade or store-bought
    1 c. freshly grated mozzarella
    1 lb. linguine or similar long strand pasta

    Instructions

    1. Preheat oven to 350ºF. Mix together Parmesan, Panko bread crumbs, Kosher salt and black pepper on a plate or wide bowl and set aside. Place eggs in a wide bowl and spread flour on a flat plate or low, wide bowl.
    2. One at a time, place each chicken breast between plastic wrap or wax paper and pound with a meat tenderizer or heavy rolling pin until each breast is ¼″ inch thick.
    3. To bread the meat, dredge each piece of chicken in flour, making sure it is entirely covered. Then, dip it in the egg mixture, followed by the bread crumb mixture, making sure the chicken is entirely coated with the Panko/Parmesan mixture.
    4. In a wide skillet, heat the olive oil and cook the chicken breasts for 3-4 minutes per side, until crisp and golden brown.
    5. Place chicken in a baking dish so that the breasts fit snuggly, overlapping slightly. Pour marinara over the chicken and sprinkle the fresh mozzarella on top. Bake for 25-30 minutes until hot and bubbly.
    6. Serve over linguine and a slice of garlic bread.

    Naptime Notes

    Naptime Recipe Serving ideas

    As you see above, to make this ahead simply leave the prepared chicken, covered, in a baking dish in the fridge until you are ready to bake. Chicken will last for up to 12 hours before being baked. This technique works very well with veal as well if you are interested in a different meat. Also, if you don’t want to the Parmesan flavor simply omit it from the breading and it will still taste great. Alternatively, if you want to ramp up the flavor add some dried herbs like basil and oregano to the breading and it will taste great!

    Naptime Stopwatch

    Preparing  the chicken during naptime takes about 20 minutes, then baking time in the evening.

    Naptime Reviews

    This is a great meal for kids and adults alike. My daughter loves it just as much as my husband – making me one proud Naptime Chef!

    More Naptime Recipes

    March 18, 2010

    Dutch Almond Tart at Barbara’s {Naptime Everyday}

    What’s Going on Today: Morning at the library to return books, romp in the park to enjoy good weather, grocery store for almond tart ingredients.
    Naptime Goals: Make Dutch Almond Tart for lunch at Barbara’s tomorrow, laundry, weed out winter clothes that don’t fit any longer, buy new shoes online for daughter – she’s outgrown them all from winter!
    Tonight’s Menu: Leftover Eggplant Lasagna, fresh jasmine rice, Double-Chocolate Espresso Cookies for dessert.
    Parenting Lesson of the Day: Chocolate milk after 5pm is a bad idea.

    Every so often my friends and I do a mass catch-up lunch. This usually involves finding babysitters for the kids and us all hauling off to a predetermined locale from 12-2pm for intense discussions about the business at hand. Unfortunately, these catch ups are less frequent then we would all like, but that’s the way it is when we all have kids and crazy schedules.

    When my friend Barbara invited us all over to her house for lunch this week I jumped at the chance to bring dessert. Ever since I’ve learned to make this tart it’s become my absolute go-to item to bring to just about any kind of celebration. It’s an ideal winter treat, a lemony shortbread crust with a thin layer of almond in the middle, topped with crunchy sliced almonds and a dusting of confectioners sugar. It is simple to make and it’s warm, bright flavor is the perfect accompaniment to almost any meal.

    My friend Vanessa from The Black Cat Cafe in Sharon Springs NY taught me out to make this tart during one of her infamous cooking classes in Cooperstown. For these particular events my mother and her cronies bring a bottle of wine – each – to their friend Veronica’s house and Vanessa comes over to demonstrate recipes. At the end of the night everyone has learned a little, eaten a lot and drunk even more. It’s a fun and often hilarious learning experience that I was lucky enough to crash one night in January when I was home visiting for the week.

    I could see the brilliance in this recipe from the start. The ingredients are simple and of good quality, and it’s very easy for me to make during naptime. In fact, it is best served after it’s cooled off and rested because it gives the lemon flavor a chance to bloom a little bit. I’ll make this for Barbara’s today then keep it, covered, at room temperature until tomorrow.

    The next time you are called on to take a treat to a friends, new parent, bake sale, or if you just want something delicious for yourself I highly recommend this as your next item. And, if you ever drive through Sharon Springs be sure to swing by the Black Cat Bakery and tell Vanessa I said Hi, and thanks for the great recipe.

    Recipe

    Dutch Almond Tart

    adapted from Vanessa of the Black Cat Bakery

    Ingredients

    2 sticks (16 T.) unsalted butter, softened
    2 c. all-purpose flour
    1 c. sugar
    1 egg
    1 t. lemon zest (use Meyer lemon if possible)
    1 t. Kosher Salt
    8 oz. Almond Paste
    ½ c. sliced almonds

    Confectioners’ Sugar for dusting

    Egg Wash: 1 egg, 2 T. water mixed together.

    Instructions

    1. Preheat oven to 325ºF. Butter a 9″inch round tart pan with a removable bottom.
    2. In a mixer fitted with the paddle attachment cream butter, sugar and lemon zest until fluffy. Then add the flour and salt and mix until just combined. Divide the dough into two even pieces and wrap each in plastic wrap and chill in the fridge for one hour.
    3. After dough has cooled, remove it from the fridge and place half the dough into the bottom of the tart pan. Press it down until it covers the bottom of the pan evenly and comes up the sides a little bit.
    4. Roll out the almond paste with a rolling pin into a flat disk about 8″ round and place it on top of the bottom half of the dough. Then, place the remaining dough on top of the almond pasta and pat it down until it covers all of the almond paste and crimp the sides together to seal. Brush the egg wash lightly on top and scatter sliced almonds over it.
    5.Bake for 35-40 minutes or until top is lightly golden and the edges are crispy and pulled away from the sides a little.
    6. Allow to cool to room temperature and remove tart from the pan. Dust with confectioners’ sugar and serve.

    Naptime Notes

    Naptime Recipe Serving ideas

    The great thing about a round tart is that it can be cut into wedges as wide or slim as you’d like. This makes is ideal for setting on a dessert buffet for many, or just serving to a few friends. It also stays fresh for a few days so you don’t have to worry about it going stale if you make it ahead of time!

    Naptime Stopwatch

    15 minutes for the batter, 1 hour for waiting (time to catch up TV!) 45 minutes for baking.

    Naptime Reviews

    The only person who wouldn’t like this is someone who doesn’t like almond, and I don’t have any such person in my house.

    March 16, 2010

    Stuffed Shells with Homemade Ricotta & Spinach {Webisode #16}


    What’s Going on Today: Taking my daughter to museum then out to lunch with her friends! (When did she start having lunch appointments?)
    Naptime Goals: Make homemade ricotta and homemade tomato sauce so that dinner is all set to assemble this evening.
    Tonight’s Menu: Baked Stuffed Shells with Homemade Ricotta.
    Parenting Lesson of the Day: Whoever thought of Daylights Savings Time was NOT a parent!

    I’ve been hooked on making homemade ricotta for a while, many thanks to my friend Jennifer Perillo, and I’ve always been a fan of homemade marinara sauce. In both cases, the homemade versions are FAR superior to anything found at the store and are incredibly easy to make. Hopefully, with this webisode you’ll see that making homemade ricotta and homemade marinara sauce takes very little time and and is well worth the effort.

    Of course, once you’ve taken the time to actually both of these delicious things it is important to incorporate them into a fabulous meal where their flavors can really shine. There have been many times I’ve made terrific lasagnas and spaghetti dishes tossed with ricotta and marinara, but over the weekend I wanted to try something different. Why not, I thought, makeover my old childhood favorite, stuffed shells.

    I think stuffed shells have gotten a bad rap over time for being boring and bland, but I am doing my best to repair their reputation. With this recipe I stuff the shells with a filling of homemade ricotta and spinach, then top them with a light layer of homemade marinara. The result is a terrific dish of light baked pasta, creamy cheese and delicious, healthy winter greens. Also, as you’ll see here, I was able to assemble everything while my daughter napped, place it in the fridge and bake it right before dinner.

    When I served this to my husband and daughter they were both enamored with the silky texture of the cheese and, in my daughter’s case, the cool shape of the pasta shell. I think she was intrigued by how different they looked from her former favorite, ravioli. Ah, kids. Either way, I was thrilled with their warm reception.

    Recipe

    Stuffed Shells with Homemade Ricotta and Spinach

    Ingredients

    1 batch Jennifer Perrillo’s Homemade Ricotta OR
    2 c. fresh ricotta bought at the store

    Homemade Marinara:

    2 28oz. cans crushed tomatoes, with juices
    6 T. butter, unsalted
    1 medium onion, peeled and cut in half
    2 T. dried basil, or 1 T. fresh basil, torn
    2 t. Kosher Salt

    A good crank or two of black pepper

    Stuffed Shells

    1 1lb. large shell pasta
    10 oz. chopped spinach, (fresh or frozen), dried
    ½ c. Parmesan cheese
    2 c. good fresh ricotta (homemade or store bought)

    Crank of good pepper

    Instructions

    1. For the Marinara: Place all ingredients in a large saucepan and allow to simmer on very low heat for 45 minutes, stirring occasionally. After simmering is complete, discard the onion halves and serve.

    1. For the Pasta: Preheat oven to 350ºF. Boil pasta in salted water according to package directions. Drain and allow cool until you can easily handle them.
    2. In a large bowl combine the ricotta, parmesan cheese and pepper. Mix it with a fork until well combined but still fluffy.
    3. Pour a thin layer of tomato sauce on the bottom of a 9×13 baking dish. Then, scoop a heaping teaspoonful of mixture into each shell and line them up in the baking dish. Ladle a second layer of marinara sauce on top of the shells and sprinkle with parmesan cheese.
    4. Bake for 35 minutes, or until heated through.

    Naptime Notes

    Naptime Recipe Serving ideas

    This dish can be prepared ahead of time and left, covered with plastic wrap, in the fridge until baking. Both homemade ricotta and homemade marinara sauce can be used for a variety of things. I highly recommend also using these for lasagnas, pizzas or breads. I recommend serving this with a big green salad.

    Naptime Stopwatch

    Ricotta: 15 minutes (so easy!) Marinara: 5 minutes for sauce, 45 minutes for simmering. Baked Shells: 15 minutes for assembly, plus baking time.

    Naptime Reviews

    My daughter was so confused, she thought her ravioli has burst open when she first looked at the shells! It proved to be a great dish for both kids and adults.

    More Naptime Recipes

    March 11, 2010

    Lemon Pudding Cake with Dad {Webisode #15}

    Lemon Pudding Cake with Dad from Kelsey Banfield on Vimeo.

    What’s Going on Today: Morning at the Farmer’s Museum to enjoy the Sugaring Off breakfast, the celebration of the maple syrup harvest with lots o’ pancakes and fresh local syrup!
    Naptime Goals: Bake Lemon Pudding Cake with my Dad, an amazing home cook who wants a lesson in folding egg whites!
    Tonight’s Menu: Italian Meatloaf with Mom, green salad, Lemon Pudding Cake for dessert.
    Parenting Lesson of the Day: Grandparents spoil their grandchildren, there is no stopping it so don’t bother trying.

    While I was home in Cooperstown last weekend my Dad and I did some baking together. He had recently picked up the new Cook’s Illustrated Entertaining and discovered a recipe for an old childhood favorite, Lemon Pudding Cake. The only problem was, despite being a great home cook, he didn’t understand the instructions on folding egg whites into the batter. I was surprised that he hadn’t done this before, but he really is more into making Short Ribs and grilling steak then he is baking, so I guess I shouldn’t be surprised.
    Lemon Pudding Cake | The Naptime Chef

    In the true spirit of Naptime Chef-ing, the moment my daughter went down for her nap Dad and I set to work on our lesson. As you’ll see above, we had a roaring good time and were rewarded with a delicious, silky lemon cake at the end. Obviously, given our family love of all things lemon, we couldn’t bear to wait for our first bite. We had our first taste when it was fresh out of the oven, then another slice after dinner when we were joined by my Mom and daughter.

    Lemon Pudding Cake | The Naptime Chef

    Given the success of this episode I’ve already put my Dad on the hook for another one, this summer we’ll be showing you how we make his famous Bread and Butter pickles. As you can see, he is a doctor and a scientist, so his canning methods are very precise and quite successful. Stay tuned!

    Recipe

    Lemon Pudding Cake

    adapted from Cook’s Illustrated Entertaining, 2010

    Ingredients

    1 ¼ c. unbleached all-purpose flour
    2 t. cornstarch
    1 ¼ c. sugar
    5 T. unsalted butter, room temperature
    2 T. grated lemon zest
    ½ c. fresh lemon juice
    1 ¼ c. whole milk
    5 eggs, separated, yolks in one bowl with whites in another

    Instructions

    1. Adjust oven rack to center position and heat oven to 325 degrees. Lightly butter an 8″ square baking pan. Bring several quarts of water to boil for water bath. Mix flour and cornstarch together in a bowl, set aside.

    2. Cream the butter, 1 c. sugar and lemon zest until light and fluffy, about 2 minutes. Then, beat in the egg yolks, then flour mixture, mixing until smooth. Slowly mix in the lemon juice, then stir in milk.

    3. Set the custard mixture aside and beat the egg whites until they hold soft peaks. Then, add the remaining ¼ c. of sugar and beat egg whites to stiff, moist peaks. Gently stir a dollop of the egg whites into the custard. Then, working slowly, fold the remaining egg whites in bit by bit until they are all incorporated, but not over beaten.

    4. Pour the batter into the baking pan and fill the hot water bath until it comes halfway up the side of the pan. Bake until pudding cake center is set and springs back when gently touched, about 1 hour. Remove roasting pan from oven and let pan cool for 1 hour before serving.

    Naptime Notes

    Naptime Recipe Serving ideas

    This really is a great cake for entertaining as the magazine suggests. We loved it with whipped cream but it would also be great with ice-cream or fresh berries.

    Naptime Stopwatch

    The batter takes about 15 minutes to prepare, then the cake bakes for about an hour.

    Naptime Reviews

    This is a cross between pudding and cake and is absolutely divine. I love the smooth texture and the lemon flavor with subtle vanilla undertones. Needless to say, so did everyone else.

    March 9, 2010

    Roast Salmon with Perfect Pesto {Powernap}

    What’s Going on Today: Babysitter arrives for daughter in the morning, I am off to appointments, lunch with friend, then home to take daughter to playdate after naptime.
    Naptime Goals: I’ll be out to lunch! (Hope my daughter behaves for the sitter – it is so rare that I have one during the daytime!)
    Tonight’s Menu: Roast Salmon with Perfect Pesto, green salad with pine nuts and gorgonzola, Rice with Toasted Almonds.
    Parenting Lesson of the Day: Babysitters serve to remind us that sometimes we need a break from our kids, and sometimes the kids need a break from us!

    Do you ever have one of those weeks when everything happens at the same time? Like, one week you have all the free time in the world to frolic in the park, and the next you barely have time to throw on some chapstick before running out the door? Well, I am having one of those weeks. I’m not quite sure how I managed to schedule things this way, but when I opened my planner yesterday I was slightly dismayed to discover that it was chock full of appointments and events. To some that may sound all very well and glamorous, me flitting around Manhattan in taxi cabs and high heels but, trust me, it’s not.

    So, what to do about dinner? Easy. For one of my meetings I will be near my favorite fish store in our neighborhood, so on the way home I’ll stop by and pick up some fresh wildcaught salmon. I still have some Perfect Pesto in the freezer and it will make for a great main course, paired with some rice and a salad.

    It is rare that we have a babysitter during the day, I usually choose to splurge in the evening when my husband and I are in the mood (re: desperate) for date night. But today I have no choice. This, of course, means that I won’t have time to Naptime Chef today. Instead I’ll turn to one of my favorite family meals that I can assemble on the fly, Roast Salmon with Pesto. As far as I can tell, there is hardly a better way to enjoy pesto. Yes, I love it roasted with creme fraiche as well, but this way is a tad tastier, I think. The garlic herb flavor of the spread contrasts beautifully with the fresh salmon, while the oil from the pesto prevents the fish from drying out in the oven.

    So, after a day out and about this is what we will be enjoying, I am happy to report. And, yes, some of the other dishes like this or this are fantastic when there isn’t much time for dinner either. The good news for you all, however, is that one of the many to-do’s on my agenda is to working on my next Webisode for Thursday. In it I’ll be baking with my Dad, a fellow home-baker who loves the kitchen as much as I do, and it is definitely not to be missed!

    Recipe

    Roast Salmon with Perfect Pesto

    from my busy home to yours…

    Ingredients

    2 T. Perfect Pesto or store bought pesto if you don’t have any on hand
    16 oz. Salmon (figure 6-8oz. per person)

    Instructions

    1. Preheat oven to 400ºF. Line a rimmed baking sheet with aluminum foil, this is immensely helpful with easy clean-up.
    2. Rinse salmon briefly under cold water and pat dry with a paper towel.
    3. Spread pesto evenly over the salmon and place on the baking sheet. Roast for 15-18 minutes, or until the salmon is cooked through and no longer pink inside. Serve immediately.

    Naptime Notes

    Naptime Recipe Serving ideas

    If you don’t have pesto on hand simply cover the salmon with a layer of creme fraiche, that will keep in the moisture and flavor of the salmon you don’t want to lose when roasting in the oven.

    Naptime Stopwatch

    This takes about 45 seconds to prepare, plus roasting time.

    Naptime Reviews

    We are still working on my daughter’s introduction to salmon, so far she seems to like the rice that I usually serve it with!!

    More Naptime Recipes

    March 4, 2010

    Snow Day Peanut Butter: The Best Cookies Ever! {Webisode #14}

    What’s Going on Today: Snow still on the ground, off to the park to attempt snowman #2 of the week, grocery shopping for weekend goodies.

    Naptime Goals: Bake cookies with the dough I made last night, Peanut Butter and Honey Sandwich for lunch, catch up on emails (!)

    Tonight’s Menu: Leftover Tomato Florentine Soup with cheese toast, peanut butter cookies for dessert.

    Parenting Lesson of the Day: Teach kids to steer clear of yellow snow!

    Winter is dragging on forever and it is driving me crazy. As you can see in the video above, the piles of snow on our somewhat clear sidewalk are over my daughter’s head – and are almost as tall as me! Cooperstown NY, where I grew up, gets more snow than any place I know so I should be used to this, but I still don’t like it.

    The funny thing about snowstorms is that they go hand in hand with comfort food. When the snow flies I have no interest in sushi or tempura, I want soups, sandwiches and peanut butter. Lots of peanut butter. My love for peanut butter is fairly serious. You can ask anyone of my childhood friends, peanut butter has been my go-to comfort food since before I can remember. It was the exclusive main course in my lunch box for at least the first five years of grade school.

    Peanut Butter Cookies

    Peanut Butter Cookies

    When the snowstorm struck the other day it triggered my comfort food reflex and I immediately reached the peanut butter jar in our pantry. Cookies felt like a must so I employed one of my favorite Naptime Chef techniques and made peanut butter cookie dough during my daughter’s naptime, then left it wrapped in the fridge overnight. The next day I retrieved the dough during naptime, baked the cookies and treated myself to a Peanut Butter and Honey sandwich for lunch. The following day I also made myself a big batch of soba noodles with peanut butter sauce, but that is a recipe for another time.

    To help you along with your peanut butter recipe repertoire, here are a few of my favorites! Enjoy!

    Naptime Chef’s Favorite Peanut Butter Cookie Recipes:

    1. Peanut Butter Cookies by Cook’s Illustrated: Soft, moist and chock full of peanut butter flavor, these are my favorite peanut butter cookies of all time. The dough is incredibly simple to make and tastes even better when allowed to rest for a day in the fridge before baking. To give it a little crunch I recommend adding a handful of chopped roasted peanuts.
    2. Peanut Butter Oatmeal Chocolate Chipsters by Dorie Greenspan: The combination of chocolate, peanut butter and oatmeal in this cookie is practically lethal. The chewy texture and slightly caramelized flavor of these cookies are perfectly balanced with a hefty dose of chocolate. Beware, it is very easy to eat the entire tray fresh out of the oven.
    3. Peanut Butter Cookie Cupcakes by Martha Stewart: Leave it to Martha to figure out take a typical peanut butter cookie recipes over the top. These little beauties are heavy on flavor and are sure to impress. Sometimes I like to dip the tops in chocolate to give them a peanut butter cup look and taste.
    4. Peanut Butter Blossoms: Though baked mostly during the holiday season, these cookies are great year-round. In fact, I am hard pressed to understand what exactly is so Christmas-y about them. I love that they are like an inside out peanut butter cups. I grew up calling them Cyclops cookies.