June 25, 2009

Banana Bread for Comfort {Naptime Everyday}

My mother’s homemade banana bread is my favorite comfort food of all time. A fresh loaf, still warm from the oven, can remedy almost any stressful situation in my life. In many ways, it is my personal (and much healthier) version of valium. No matter the situation, one bite of mom’s bread and all my concerns melt away for a few blissful moments. In fact, this bread has such power over me that while I was primping for my wedding ceremony, my brother slipped me a few slices. It was a clever move on his part. Casually snacking on my favorite food was the perfect way to calm my jitters, ensuring I wouldn’t faint dead away during my vows (I didn’t).


Luckily for me, my mother wrote her banana bread recipe on a card with her name on top, “Carla’s Kitchen”, and gave it to me when I moved to New York. Since then I have been baking it regularly – as evidenced by the stockpile of bananas in my freezer – and it was even one of my daughter’s first solid foods. Of course, like any good home baker, I am always happy to entertain new variations of banana bread recipes. I have tried dozens over the years, even tucking a few into my permanent recipe binder. You might remember that last winter I shared one of Molly’s favorite banana bread recipes, when I reviewed her book. I love her method and have made it several times since. However, no matter how interesting or unique the variation, Mom’s homestyle version is still my top choice.
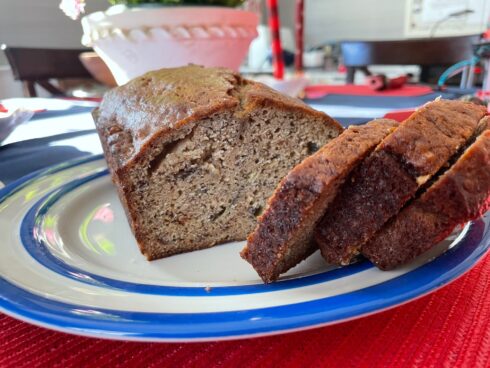
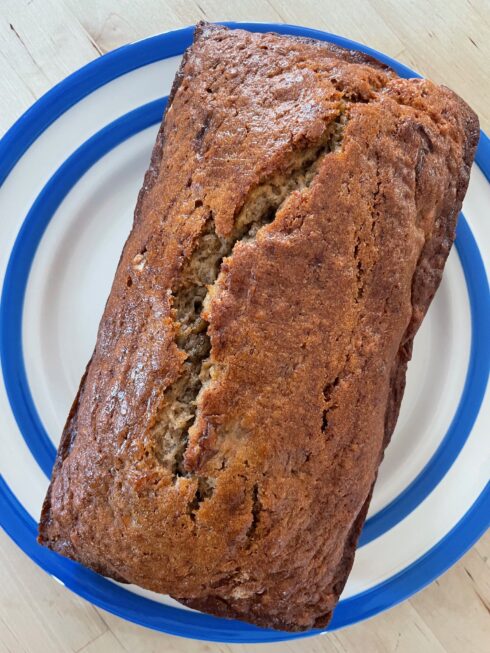

I love Naptime Chef-ing banana bread for many reasons, not the least of which are that the batter is a snap to prepare, and the final product guarantees several days of snacking pleasure. Even just being in my apartment while it bakes is a treat in itself. I am always seduced by the aroma of warm banana and sweet spices that wafts through our home, making the process of letting it cool before I dig in an exercise in self-restraint. Sometimes I add chocolate chips as a treat, which adds another delicious element to the sweet fragrance. In my opinion the best thing about this bread is it’s genuine banana flavor. It is neat and clean, unadulterated by overwhelming spices or additional ingredients. Instead, the cinnamon and nutmeg gently highlight the fresh banana flavor without muddling it up. This bread is perfect for children, as well. Even though my daughter can’t articulate her feelings yet, by the way she devours slice after slice, I can already see that it has become a favorite of hers, too.

Recipe

Naptime’s Perfect Homestyle Banana Bread

adapted from an old handwritten recipe from my mother and grandmother

Ingredients

8 T. (1 stick) unsalted butter
1 c. sugar
2 eggs
1 t. good vanilla extract
ripe bananas, mashed (I mash them in a bowl with a fork)
2 c. all-purpose flour
1 t. baking soda
½ t. nutmeg
1 t. cinnamon
¾ c. mini-chocolate chips (optional)

Instructions

1. Preheat oven to 350. Butter and flour a standard 9×5 loaf pan*.
2. Mix together butter and sugar until fully combined. Add eggs and vanilla extract, mix well. Add mashed bananas, mix again until completely combined.
3. In a separate bowl mix flour, soda, nutmeg, cinnamon and chocolate chips. Stir this mixture a few times and make sure the chips are fully coated with flour.
4. Working slowly, stir flour mixture into egg mixture. Keep stirring until all flour is fully incorporated. The batter may still be a little lumpy from the bananas, this is normal.
5. Pour batter into prepared loaf pan. Bake for 45 – 50 minutes or until top is golden and a cake tester comes out clean.
6. Cool in the pan for 10 minutes. Then, carefully remove it from the pan and let it cool on a wire rack before serving.
*You can also divide the batter into smaller loaf pans, or mini loaf pans if you want to make smaller breads.
Freezer Tips: This bread freezes well. If you want to save it for later simply wrap it tightly in plastic wrap. Then wrap it again with an outer layer of aluminum foil. Make sure none of the bread is exposed to air. It will last in the freezer for 2-4 months.

Naptime Notes

Naptime Recipe Serving ideas

Banana bread goes with just about anything. It can be eaten for breakfast, lunch or dessert. I have even grilled it before – it is delicious this way!

Naptime Stopwatch

The batter preparation takes a brief 5 minutes. Baking breads always takes a long time, this one needs to bake for about 50 minutes.

Naptime Reviews

Banana bread is a regular part of my daughter’s diet, she can never get enough. While this is a traditional comfort food, I have served it to guests as well. It is great for serving at playgroup, taking to a potluck, or bringing to a housebound friend.

June 24, 2009

Gingersnap Ice-Cream {Powernap}

Christmas in June? I hope not – though with the weather in NYC lately anything is possible. Either way, this sweet and spicy Gingersnap Ice Cream is the perfect way to enjoy the flavors of the holidays in summer style. After making this you will agree, there is no reason the classic flavor of gingersnaps needs to be confined to the winter months. Simply crank up the ice-cream maker and enjoy! Like your ice-cream extra spicy? Be sure to read the notes at the bottom, they indicate how to turn up the heat. If you think you can handle it.

Recipe

Nicole’s Gingersnap Ice Cream

Ingredients

2 egg yolks
1 cup whole milk
1 cup heavy cream
2 T. molasses
½ cup sugar
1 T. ground ginger
2 t. cinnamon
2 dashes of nutmeg

Instructions

1. Combine milk and heavy cream in a large saucepan and bring to a low boil. Add molasses, and stir to incorporate. In a separate bowl, whisk egg yolks, sugar, and spices. Add one cup of hot milk mixture to egg mixture, stirring constantly. Add remaining milk mixture to eggs, then pour full mixture back into sauce pan and cook over low heat, stirring constantly, until mixture coats the back of a spoon – about 5 minutes.

2. Pour mixture into clean glass bowl and refrigerate for a minimum of 4 hours, and/or up to overnight.

3. Pour mixture into ice cream maker and follow manufacturer’s instructions on time. Scoop into container and freeze for a minimum of two hours.

Note: This recipe has an intense ginger flavor at first taste. If left up to one day in freezer, the taste mellows slightly. You can adjust ginger ratio down to make it more mild – or, if you are like my husband and like your gingersnaps as spicy as possible, you can add crystallized ginger or crushed gingersnap cookies to the mixture – after the ice cream maker, before the freezer!

Additional note: this mixture makes a softer, creamier ice cream than some of the others, so does not require any time out of the freezer before serving.

Naptime Notes

Naptime Recipe Serving ideas

Naptime Stopwatch

Naptime Reviews

June 23, 2009

Browned Butter Asparagus Risotto {Naptime Everyday}

I am not the kind of person who spends much time worrying about being trendy. I don’t replace my entire wardrobe seasonally, redecorate my house yearly, or choose vacation destinations based on their celebrity quotient. Instead, I like to feel out the latest trends before I invest my time or money. Some fads come and go in a blink, while others become mainstays that are worth getting to know. This recently happened with the food trend of browned butter, which is regular butter that is toasted until it becomes golden brown and adopts a warm nutty taste. A few years ago most home cooks had no idea what it was, but these days it is all the rage.

I’ll be the first admit that I did not initially embrace the concept of browned butter. I simply didn’t understand how or why browned butter could really change the flavor of a dish. In fact, I don’t think I would ever have started cooking with it had it not been for my mother-in-law’s browned butter sage sauce. She served it over chicken last fall and, after one bite of the warm almost almond-like flavor, I was hooked. I started searching for recipes with browned butter and made several interesting discoveries, including one from Cook’s Illustrated which cited browned butter as the key ingredient in their best-ever chocolate chip cookies. In keeping with this trend, last month’s Vogue featured an article by Jeffrey Steingarten devoted entirely to the unique taste of browned butter, chiding us all for not seeing it’s benefits earlier.


I knew my conversion to being a browned butter-devotee was complete when it became my go-to method for all of my favorite homemade risotto recipes. Risotto has always been a big family favorite of ours, and now it is even more so. When risotto is prepared with browned butter, it’s normally light creamy flavor gets deeper and richer. The toasted butter adds a whole new dimension, it’s nutty flavor seems to enhance the dish’s rich earthy chicken and vegetable flavors.

Cooking my go-to recipe for Browned Butter Asparagus Risotto is fairly simple. To save myself time in the evening, during my daughter’s afternoon naptime I begin my meal preparation by chopping the onion, blanching the asparagus and preparing chicken stock. This way, when it comes to dinnertime, making the risotto is merely a matter of combining the ingredients and stirring lazily with my wooden spoon. To add salt to this particular meal I like to make baked prosciutto “chips,” these lend the toothsome rice a nice light crunch. I know that in my household browned butter is here to stay, and, I think, after you try this recipe you will agree. Browned butter is no longer a trend, it is a classic.

Recipe

Naptime’s Browned Butter Asparagus Risotto

adapted from recipes by Giade de Laurentiis and Mario Batali

Ingredients

1 lb. fresh asparagus, blanched and cut into 2 inch pieces
5 T. unsalted butter, room temperature
medium onion, finely chopped
1 ½ c. Arborio rice
½ c. white wine
4 c. chicken stock (I use Knorr bouillon cubes when I don’t have homemade stock on hand)
½ c. fresh grated parmesan

Instructions

1. In a wide saucepan, I usually use my Dutch oven, heat the butter over medium heat. Allow the butter to warm until it turns a warm, golden brown and has a nutty fragrance. About 1 ½ to 2 minutes.
2. Add onion and saute until translucent. About 4 minutes.
3. Add rice and stir until it is coated with the butter and well-mixed with the onion. Then, add the wine and deglaze the bottom of the pan, scraping up any browned bits.
4. Simmer until the wine has completely evaporated. Then, add ½ c. of the chicken stock and stir until it is completely absorbed. Continue adding the chicken stock by ½ c. until it absorbed. About 10 minutes.
5. Once all the chicken stock has been added, cook until the rice is tender to the bite. About 5 minutes.
6. Remove risotto from heat and add remaining parmesan and butter. Stir until completely absorbed.
7. Finally, add the asparagus pieces, stirring into the risotto. Break prosciutto pieces over rice and serve.

Naptime Notes

Naptime Recipe Serving ideas

This is a delicious recipe that is flexible in every way. If you would rather make it with vegetable stock, go right ahead. Or, if you’d rather use mushrooms or peas instead of asparagus, that is fine, too.

Naptime Stopwatch

Pre-chopping the onions and blanching the asparagus saves a lot of time when assembling the meal in the evening. This way, the total assembly in the evening is about 30 minutes, maximum.

Naptime Reviews

Adults and children alike love risotto, including mine. It is soft enough for my toddler to chew, but sophisticated all of us for dinner.

June 22, 2009

Cardamom-Saffron Macaroons {Powernap}


I was thrilled when Monica Bhide, the present-day authority on contemporary Indian cooking, gave me the opportunity to participate in a “virtual potluck dinner” celebrating the launch of her new cookbook, Modern Spice. I have been a longtime fan of her work and am always eager to cook from her repertoire, the recipes never disappoint.

Since I do most of my cooking and baking while my daughter naps, it was ideal when Monica asked me to bake a batch of her Saffron-Cardamom Macaroons. They are chic enough for any dinner party, humble enough to serve at home, and easy to prepare ahead of time. As expected, preparing them was a snap. I simply whipped the egg whites, added a pinch of salt so they would hold their peaks, and folded them into the coconut mixture. I will admit, however, that I did take a small detour with my ingredients. Per Monica’s suggestion, I chose to add a dash of cinnamon to my batter, since it is my favorite spice.

Once the baking was completed I let the macaroons cool before consumption. I should let you know that this process – letting them cool before eating – was extremely difficult. When they had been baking, my apartment had filled with the mouth-watering aroma of toasting coconut and warm nutty spices. I couldn’t wait to dig in. After what felt like hours (it was, in fact, minutes) I finally took my first bite and was immediately transported. The unusual combination of saffron, cardamom and cinnamon woven with sweet coconut created a delicious layer of flavors that was bold, but not overwhelming. Unlike most macaroons I eat, these were neither too overly sweet or sticky. Instead, they had an amazing depth of flavor with a light, flaky texture, and were perfect to enjoy while I sipped my cup of tea.

I’ll admit that I ate several macaroons in one sitting and, later, my husband did, too. He even agreed that I should start experimenting with the jars on my lazy susan to come up with new macaroon flavors based on Monica’s recipe. I can’t wait to get started. In the mean time, I will be making this recipe again shortly. I am hosting a dinner party soon, and am serving these for dessert.

Order your own copy of Modern Spice HERE!:

Recipe

Saffron-Cardamom Macaroons
reprinted with permission from Modern Spice, by Monica Bhide

Ingredients

4-ounce package shredded sweetened coconut
10 ounces sweetened condensed milk such as Eagle brand, from a 14-ounce can
1 ½ teaspoons ground cardamom
1 teaspoon saffron threads, crushed
¼ teaspoon table salt
2 small egg whites, whipped to peaks (see Notes)

Instructions

1. Heat the oven to 350°F. Prepare a baking sheet by lining it with parchment paper and lightly spraying with nonstick spray.
2. Combine the coconut, condensed milk, cardamom, saffron, and salt in a bowl. (It will form a mixture that is not like typical cookie dough, but once the egg whites are folded in, the mixture will hold together.)
3. Gently fold in the whipped egg whites.
4. Using a spoon, mold the mixture into tablespoon-size balls and place 1 inch apart on the prepared pan.
5. Bake the macaroons for 14 to 16 minutes, until the exterior is very slightly brown, the middle is still soft, and the bottoms are beginning to turn golden brown.
6. Remove from the oven. Allow to cool for about 20 minutes.
7. Serve at room temperature. These can be stored in an airtight container for up to a week.

Notes: Don’t use wax paper when baking; it will smoke in the oven. Parchment paper works best. Use room-temperature eggs. I like to add a touch of lemon juice, salt, or cream of tartarto help the eggs get the peaks. Once you begin to whisk them and they reach the soft peak stage, stop. If you continue to beat them, the proteins will break down and you will have a soft mess on your hands.

Naptime Notes

Naptime Recipe Serving ideas

Naptime Stopwatch

Naptime Reviews

More Naptime Recipes

June 20, 2009

Pineapple Mint Sorbet {Powernap}

Nicole and I believe that variety is the spice of life, which is why we agree it is a good idea to include sorbet recipes in TNCGICF. I mean, almost everyone we know loves sorbet just as much as ice-cream, and sometimes even more. This recipe for pineapple mint sorbet was inspired by the fresh mint in Nicole’s garden. We love this combination of flavors, the cool mint with the sweet pineapple makes for a refreshing summer dessert any day of the week.

Recipe

Nicole’s Pineapple Mint Sorbet

Ingredients

1 fresh, whole pineapple
¾ c. sugar
2 T. corn syrup
2 c. water
10-14 Peppermint Leaves, torn

Instructions

1. Cut and core pineapple into chunks. Mix pineapple pieces with ½ cup of sugar, and refrigerate for a minimum of 1 hour (3 hours is preferable).
2. In a medium saucepan, bring water and corn syrup to a slow boil. Add remaining ¼ cup of sugar, and the mint leaves. Stir while sugar dissolves, then turn off light, cover, and let the syrup mixture sit on stove for 1 hour. After one hour, pour mixture through a sieve to remove mint leaves, and chill syrup in refrigerator for the remaining 2 hours.
3. Remove pineapple and pulse in blender until smooth (can be left somewhat chunky, if this is your preference). Mix pureed pineapple and syrup together to combine well, then mix in ice cream maker according to manufacturers instructions.
4. Chill in freezer for 4 hours, or overnight.

Naptime Notes

Naptime Recipe Serving ideas

Naptime Stopwatch

Naptime Reviews

June 18, 2009

Neiman’s Chocolate Chip Oatmeal Cookies {Naptime Everyday}

If the world fell apart I am pretty sure I would be alright as long as I had my family, and chocolate chip cookies. It is a well known fact amongst my family and friends that I am a total snob when it comes the most classic cookie flavor known to man. In fact, my ever-expanding recipe binder has a special section – equal in size to the “pasta” chapter – devoted entirely to chocolate chip cookie recipes. I take no small amount of pride in this well-edited recipe collection. After all, I am a ruthless taste-tester, having spent years studying how the perfect combination of butter and chocolate should melt in my mouth. Of course, like any good collector, I am always open to trying new recipes that come my way. But, if the end results is not up to snuff, the recipe tossed in the garbage. Permanently.


I chose to make my Neiman-Marcus Chocolate Chip Cookie recipe last week because I needed a big batch of delicious cookies, fast. Like most people I know, I received a version of this recipe from a forwarded email several years ago. The note included a lengthy urban myth about a woman’s revenge at being charged $250 at Neiman’s, for a recipe she thought she was receiving for free. Thus, she circulated the recipe as widely as possible via the internet, to ensure nobody would ever have to pay for the recipe again. Of course, it is widely acknowledged that this story is complete fiction, there is not one ounce of truth in it. But, urban myth or not, I baked a batch just to see what they were like, and am still making them today.


My favorite part about the taste of these cookies is that the texture is unlike any other I’ve tried. This comes from unusual addition of blended oatmeal. Instead of calling for whole flakes of oatmeal, like we normally eat at breakfast, this recipe instructs that the grains be ground into a fine powder. The result is nothing short of genius. The blended oatmeal imbues the cookies with a sweet nutty flavor, but avoids giving them the dry crumbly texture usually associated with oatmeal-laden cookies. The shredded Hershey bar also creates an unexpected twist. The thin milk-chocolate flakes melt into the dough while baking, creating a subtle chocolate flavor that isn’t overwhelming.

Making these cookies during my daughter’s afternoon naptime is a cinch. The best part for her is that when she wakes up our home smells like her favorite bakery, and I let her enjoy a cookie for her afternoon snack. In the end, I doubt any of us will ever learn the true origins of the faux Neiman-Marcus Chocolate Chip Cookie recipe. But, the truth doesn’t really matter to me. This recipe has earned a permanent spot in my binder. Which is right where it belongs.

Recipe

Naptime’s Chocolate-Chip Oatmeal Cookies

adapted from the faux Neiman-Marcus Cookie recipe, made popular by urban legend

Ingredients

4 sticks unsalted butter, room temperature
2 c. sugar
2 c. dark brown sugar
4 eggs
2 t. good vanilla extract
5 c. blended oatmeal* (use Regular Oatmeal, not instant)
4 c. all-purpose flour
2 t. baking soda
2 t. baking powder
1 t. Kosher salt
1 7 oz. Hershey bar, shredded (I put it in the food processor)
2 c. chopped walnuts (optional)

Dough Tips: If you want a smaller batch you can easily halve this recipe. Or, you can prepare the full recipe and freeze half the dough, tightly wrapped in plastic, to bake at another time.

*To make blended oatmeal, put it in your food processor and pulse until it is a fine powder.

Instructions

1. Preheat oven to 375. Prepare baking sheets with Silpat or parchment paper.
2. Prepare blended oatmeal.
3. In a large bowl add blended oatmeal, flour, salt, baking powder and baking soda. Stir and set aside.
4. In a mixer fitted with a paddle attachment, cream together butter and sugars until light and airy. Add eggs and vanilla and mix well.
5. Add flour mixture to sugar mixture and incorporate.
6. Prepare Hershey bar by shredding it in the food processor. Add to dough in the mixer.
7. Gently pour chocolate chips into the dough. Mix to incorporate.
** If possible, let dough rest in the refrigerator for at least 6 hours before baking.
8. To bake, roll dough into 1 inch round balls and place, two inches apart, on cookie sheets. Bake at 375 for 10-12 minutes. Cool and serve.

Naptime Notes

Naptime Recipe Serving ideas

The blended oatmeal and shredded chocolate give this cookie a unique twist with both flavor and texture. It is easy to complete during naptime, and perfect for when you need a big batch of cookies to serve to a crowd, or for a bake sale.

Naptime Stopwatch

Preparing the dough takes about 15 minutes. I usually let the dough rest and do my baking after my daughter goes to sleep.

Naptime Reviews

These cookies are heavy on the butter which keeps them thin and crispy. Everyone loves them, especially when I serve them alongside a big bowl of vanilla ice-cream.

June 17, 2009

Malted Milk Ice-Cream {Powernap}

Malted milk is a classic flavor which conjures up images of ice-cream parlors and poodle skirts for many. While malt powder is somewhat out of vogue these days, my family still adores it. We always have a container of it in the cupboard, Ovaltine being our preferred brand of choice. This ice-cream flavor brings me straight back to the days of ordering chocolate malt shakes with my Dad at Red Nugget Ice-Cream in Cooperstown. I hope it brings back happy memories for you, as well.

Recipe

Naptime’s Chocolate Malted Milk Ice-Cream

adapted from The Perfect Scoop by David Leibovitz

Ingredients

1 c. half and half
2 c. heavy cream
2/3 c. sugar
½ t. coarse salt
½ t. vanilla extract
2/3 c. malt powder (Carnation, Ovaltine & Horlick’s are all popular brands)
2 squares unsweetened chocolate* (I use Ghiradelli)
5 large egg yolks
1 ¾ c. malted milk balls, coarsely chopped
*Note: If you want regular malted milk ice-cream, do not add the melted chocolate.

Instructions

1. Coarsely chop malted milk balls, then place in the freezer.

2. Bring half and half, and heavy cream to a boil in a large saucepan. In a microwave melt the chocolate squares and set aside to cool. In a separate bowl, whisk the egg together with the sugar and salt, until thick and well mixed. Add melted chocolate and mix until well incorporated. Once the liquid has come to a boil, lower light, and add a scant half a cup of liquid into the egg mixture to temper the eggs. Gradually add the remaining hot liquid into the egg/sugar mixture, while continuing to stir. Once all liquid has been added, mix well. Pour the incorporated mixture back into the saucepan and cook over a medium low heat, stirring continuously. Do not let mixture come to a boil!

3. Once custard thickens (enough to coat the back of the spoon), remove pan from heat and pour over a strainer into a heatproof bowl. Mix in vanilla extract. Refrigerate the custard for 4-6 hours, or overnight.

4. Scrape the chilled custard into your ice cream maker and churn according to manufacturer’s instructions. By hand, add the chopped milk balls, and mix to incorporate throughout frozen custard. Pack ice cream into a container and freeze for a minimum of 2 hours. Note: if you freeze the ice cream for a night before use, ice cream will be very dense. Remove 10-15 minutes before you wish to serve.

Naptime Notes

Naptime Recipe Serving ideas

Naptime Stopwatch

Naptime Reviews

June 11, 2009

Ruth’s Curry Chicken Salad {Naptime Everyday}

Picnic season has finally arrived, hip hip hooray! What is your favorite picnic food? I would love to know. I am always looking for new and exciting treats to bring to my favorite summer activity. If you have any dishes you’d like to share, please leave comments below.

In the mean time, in the spirit of kicking off the season of moveable feasts, I am going to share one of my most favorite picnic foods, Ruth’s Curry Chicken Salad. To some this may sound boring and common, however, I promise, it is anything but. This salad is a medley of unique flavors that will satisfy even the snobbiest of chicken salad connoisseurs. It is my time-tested dish for summer gatherings, and, trust me, if you serve this at a picnic, there won’t be any leftovers.

My friend Ruth gave this recipe to my mother-in-law and I over a decade ago. At the time Ruth was our neighbor on Martha’s Vineyard, happily living out her retirement overlooking Lagoon Pond. Ruth was an extremely special person, she was full of intelligence and wit, gracious to a fault, and had a life history more interesting than that of most world leaders. Born in Niagara Falls, Ruth graduated from Cornell in 1938 – a time when very few women graduated from college at all – with a degree in Home Economics. After college Ruth went on to live with her husband in Buenos Aires, where she occasionally dined with Eva Peron, travel to all seven continents and raise three successful children. Honestly, I could write about this fascinating woman all day, but I will save that for another time. Today I am going to share one of the thousands of treats she brought us from her warm family kitchen, her awesome salad.


I first tasted this recipe when Ruth brought it to our Fourth of July buffet picnic. Upon first bite I knew it was the perfect chicken salad for me, and have been making it every since. I love that it’s warm, sweet taste is purposely not dulled down with heavy mayonnaise. Instead, the ingredients are bound together with a tangy Greek yogurt sauce, which really allows the delicious medley of flavors to stand out and show their stuff. Plus, like all good salad recipes, this one has a good amount of flexibility. You can easily omit the peanuts, coconut or raisins, or substitute them for other popular salad ingredients, like green grapes or chopped apples. Additionally, you should feel free to adjust the amount of curry powder to suit your taste. We prefer it at a restrained medium heat, though some people like it fiery hot.

The preparation of this salad is very straightforward and I am able to handily complete it during my daughter’s afternoon naptime. This way, we are able to head straight to our picnic, food in the hand, the minute she wakes up. I hope that you have a fun picnic to attend soon, and that you choose to bring this salad. Ruth would be happy to know that everyone is enjoying her recipe, and I would be, too.
(Don’t forget to share your favorite picnic food below!)

Recipe

Ruth’s Curry Chicken Salad

adapted from a handwritten original recipe by Ruth Apeseche

Ingredients

  • Salt & Pepper to taste
  • 1 ½ – 2 lbs boneless, skinless chicken breasts, cut into small, thin strips
    1 large Vidalia onion, finely chopped
    2 t. curry powder for the chicken (or more, if you like it hotter)
    2 t. curry powder for yogurt sauce (or more, if you like it hotter)
    ¼ c. olive oil
    4 c. cooked Basmatic rice (4 cups AFTER it has been cooked, not 4 c. dry rice)
    1 10oz. package petite frozen peas, thawed (not cooked!)
    ½ c. golden raisins
    1/3 c. unsalted peanuts, toasted
    1/3 c. sweetened shredded coconut
    ¼ c. sliced scallions
    ¼ c. mayonnaise
    1 c. full-fat Greek yogurt, well stirred
    ¼ c. light cream

    Instructions

    1. Saute the chicken strips in olive oil with the chopped onion and 2 t. curry powder. When chicken is fully cooked through, set aside and let cool.
    2. Cook basmati rice according to package directions.
    *You can prepare up to this point one day ahead of time*
    3. In a large bowl place the basmati rice, cooked chicken, cooked onion, scallions, peanuts, coconut, raisins and peas. Combine well with your hands or a large wooden spoon.
    4. In a separate bowl, whisk together mayonnaise, yogurt, cream and remaining 2 t. of curry powder. Add more curry if you want the salad hotter.
    5. Pour sauce over salad, mix the salad with your hands, or wooden spoon, until well-incorporated.
    6. Add salt and pepper to taste.

    Naptime Notes

    Naptime Recipe Serving ideas

    Chicken salad is easily one of the most popular dishes at summer picnics, and this one is top notch. Feel free to play with the ingredients depending on your tastes, like any good salad recipe, this one is flexible.

    Naptime Stopwatch

    The preparation of the salad takes half of my daughter’s naptime, which, in my opinion, is an hour well spent. The enormous amount this recipe yields is more than enough to feed the family for at least two days.

    Naptime Reviews

    Both adults and children alike love to eat this salad. Sometimes the kids prefer it without the peanuts and raisins, so I just pick them out. Also, this dish is completely gluten-free if that is a concern in your household.

    June 9, 2009

    Pauline’s Lazy Dazy Cake {Naptime Everyday}

    I am a go-getter by nature. Maybe it is the Virgo in me, but laziness has never been a problem of mine. I love days when I wake up energized and am able to handily complete everything on my ambitious agenda, ending the evening with a long list of accomplishments. In my ideal world everyday would be like this, full of productivity and excitement. Unfortunately, however, no matter how hyper-organized I am, this is not the case. Some mornings I wake up exhausted with dark circles under my eyes from being up during the night with my daughter. At these moments my priorities flip from plowing through another lengthy to-do list, to parring down my daily schedule and conserving my energy. Thus, when it comes to planning our meals on these occasions, I head straight for my go-to binder that is chock-full of recipes for emergency meals and simple baked goods.


    Last week my daughter woke me up at 5am, for the day. You can imagine my delight at hearing her call my name (“Momma, Momma”) from her crib so early. Desperate for more shut eye I tried everything I could to soothe her back to sleep, but she wasn’t interested. The sun was rising, the birds were chirping and she was ready to embrace the morning. Reluctantly, I made breakfast and set about our daily routine, albeit two hours earlier than usual. Finally, after my third cup of tea, the fog in my head slowly began to clear and my thoughts turned to the cake I needed to make for a dinner party that evening. I hadn’t decided exactly what to bake yet, but it was clear I had to choose a recipe that was delicious yet practical. I simply didn’t have the energy or patience to make anything involving multiple layers or decorative frosting.


    After a quick perusal of my recipe file I plucked out one of my standby cake recipes, Great-Grandmother Pauline’s Lazy Daisy Cake. This is one of my favorite cakes for many reasons, it is a cinch to make when my energy level is sapped, and it is absolutely delicious. Also, I think the rhyming title is fun to say out loud. Preparing this cake requires little more than basic stirring with a wooden spoon and bowl. On this particular day, after my daughter went down for her nap, I assembled the simple batter in less than six minutes and popped it in the oven. When the baking was complete I immediately added the topping, put it under the broiler for a short 30 seconds, and the cake was done. That evening everyone cleaned their plates while praising it’s moist, tender crumb, intense vanilla flavor and sweet crunchy topping. Several people remarked that it must have taken me over an hour to make. I graciously accepted their compliments, without letting on that I had secret. The cake had taken so little time to prepare that, when it was finished baking, I had taken a nap, too.

    Recipe

    Naptime’s Lazy Daisy Cake

    adapted from Great-Grandmother Pauline’s recipe

    Ingredients

    ½ c. whole milk
    1 T. butter
    1 t. vanilla
    2 eggs
    1 c. sugar
    1 c. all-purpose flour
    1 t. baking powder
    ¼ t. salt

    Topping (also known as ‘German Frosting’)

    5 T. dark brown sugar
    3 T. butter
    3 T. cream
    ¾ c. walnuts, chopped
    ½ c. sweetened shredded coconut (optional)

    Instructions

    1. Preheat oven to 375. Butter and flour 9-inch round cake pan.
    2. Heat milk, butter and vanilla in a sauce pan until butter is melted. Remove from heat.
    3. In large, heatproof bowl, add combine sugar, flour, eggs, baking soda and salt.
    4. Slowly add milk mixture to flour mixture, stirring constantly so as to temper the eggs.
    5. Mix batter until fully combined with no lumps.
    6. Pour into baking pan and bake for 20-25 minutes.
    7. In a separate bowl combine butter, cream and brown sugar until fully combined. Add walnuts and mix until nuts are fully coated.
    8. When cake is finished baking immediately put on walnut topping and spread it around until it completely covers the cake.
    9. Switch the oven to broil and move the oven rack to the top.
    10. Place cake on top rack and broil for 30 seconds or until nuts get dark.
    11. Cool and serve.

    Naptime Notes

    Naptime Recipe Serving ideas

    The vanilla flavor of this cake is not overly sweet and contrasts nicely with the crunchy walnut topping. I like to serve it with ice-cream, but it would be good with fruit on the side. This recipe could also possibly make a nice layer cake, you could make two of the cakes and use the walnut frosting between the layers and on top.

    Naptime Stopwatch

    Making the batter took 6 minutes, the baking took 22, and the topping took 30 seconds. So, from start to finish, this cake takes less than 30 minutes to prepare. You can’t beat that time frame.

    Naptime Reviews

    This sweet vanilla cake is always a hit with my family or crowds. You will hardly ever find a person who can’t resist eating their entire serving.

    June 5, 2009

    Almond Ice-Cream with Cherries & Chocolate Chunks {Powernap}

    Welcome to the first flavor of “The Naptime Chef Great Ice-Cream Festival of 2009.” Nicole brilliantly wrote this recipe at the behest of a good friend. We loved the idea of almond flavored ice cream studded with sweet cherries and chocolate chunks. It sounded like an ideal trifecta of flavors with the perfect balance of creamy and crunch. We hope you enjoy this as much as Nicole’s dinner guest’s did last week! (Remember, this is the first of many ice-cream recipes to come this summer, we will posting them at least once a week. The next one will be up very shortly…) Enjoy!

    Recipe

    Nicole’s Almond Ice Cream with Cherries & Chocolate Chunks

    Ingredients

    cups whole milk
    cup heavy cream
    6 large egg yolks
    ¾ cup sugar
    T. of almond extract
    ½ cup of almond slivers, toasted and cooled
    ½ cup mixture of dried cherries and bittersweet chocolate

    Instructions

    1. Toast almond slivers, cool them, then place in the freezer.

    2. Combine dried cherries and chocolate in a bowl, and freeze (freezing helps to keep your mixed ingredients from becoming “gummy” in the ice cream). For the cherries, Nicole did not need to reconstitute them, because they were quite moist, and the freezing helped to keep their texture.

    3. Bring milk and heavy cream to a boil in a large saucepan. In a separate bowl, whisk the six egg yolks together with the sugar until thick and well mixed. Once the liquid has come to a boil, lower light, and add a scant half a cup of liquid into the egg mixture to temper the eggs. Gradually add the remaining hot liquid into the egg/sugar mixture, while continuing to stir. Once all liquid has been added, mix well. Pour the incorporated mixture back into the saucepan and cook over a medium low heat, stirring continuously. Do not let mixture come to a boil!

    4. Once custard thickens (enough to coat the back of the spoon), remove pan from heat and strain into a heatproof bowl. Mix in almond extract. Refrigerate the custard for 4-6 hours, or overnight.

    5. Scrape the chilled custard into your ice cream maker and churn according to manufacturer’s instructions (Nicole always finds between 15-18 minutes is best). Mixture will resemble a coarse “slushy.” By hand, add in the almond slivers, cherries and chocolate pieces, and mix to incorporate throughout frozen custard. Pack ice cream into a container and freeze for a minimum of 2 hours. Note: if you freeze the ice cream for a night before use, ice cream will be very dense. Remove 10-15 minutes before you wish to serve.

    Naptime Notes

    Naptime Recipe Serving ideas

    Naptime Stopwatch

    Naptime Reviews

    June 4, 2009

    Perfect Pesto {Powernap}

    Last week I took my daughter herb picking in her grandparent’s backyard. She loves to do this because it is one of the few occasions in which we encourage her to yank apart plants. Most of the time we end up tailing her around the flower beds reminding her to treat tulips gently, which she finds very boring since she’d rather pull them up, bulbs and all. The other day her herb “harvest” yielded several stalks of rosemary, a few handfuls of chives and, my favorite, large bunches of basil. After we separated our “crops” into ziploc bags we took them inside to assess the menu possibilities. Naturally, with the rosemary on hand, my father and husband agreed that lamb for dinner was the obvious choice. Mom happily took the chives to make her famous potato salad and, me, well, that was easy. I wanted all the basil I could grab, it was time to make pesto.


    To my palate, this sauce is the epitome of summer with it’s pitch perfect blend of earthy sweet basil, fruity olive oil, rich pine nuts and salty cheese. A lot of people I know make pesto year-round with imported leaves they buy at the store. I have attempted to do this on several occasions, but have always been disappointed. The flavor tastes dull and lacks the bright lemony tang that comes with fresh basil directly from the source. Instead, I choose to make batch after batch of pesto during the summer and freeze it. This enables me to enjoy it all year, freeing me from the terrifying prospect of a pesto-free winter.


    One of my favorite things about pesto is that it’s a snap to prepare. Making it only requires a few moments of pressing the pulse button on my food processor and, voila, the delicious sauce is finished. Needless to say, it is extremely simple to make during my daughter’s naptime, and the payoff is enormous. Once I have completed the laborious act of pulsing, I divide up the pesto amongst containers (two for the fridge, two for the freezer). I happily maintain this routine all the summer until I have enough in my freezer to last the entire winter.

    My favorite way to enjoy pesto is served over warm pasta, or as a dressing for salad. On Saturday I stirred a big dollop into a bowl of delicious homemade gnocchi. Then, last night, I spread it on my vegetable panini. Even better, to my delight, my daughter has recently become obsessed with pesto and now eats it almost daily. Her favorite preparation is when I toss it with fresh cheese tortellini – I call it her “tortellini pesto bowl” – which she wolfs down without a second thought. I look forward to the day when I can explain that her favorite sauce is made with the plants she “harvests” from the backyard. I think she will be thrilled.

    Recipe

    Naptime’s Go-to Perfect Pesto – adapted from an old recipe from Mom

    Ingredients

    2 cups packed fresh basil leaves (pack them in tightly!)
    2 large garlic cloves
    ½ c. pine nuts
    ½ c. freshly grated Parmesan cheese
    ¼ c. freshly grated Romano cheese
    2/3 c. good olive oil

    Instructions

    1. Combine basil and garlic in a food processor and blend to a fine paste.
    2. Add pine nuts, process until smooth.
    3. Add cheeses and process again, until smooth.
    4. With the machine running, pour the olive oil in the food processor and mix until smooth and creamy. If pesto seems too thick pour in ¼ c. warm water.
    5. Pesto will stay in the refrigerator for up to 10 days in a sealed container. Or, if you want to save it for later, freeze it using the instructions below.

    Freezing Pesto: To freeze pesto put it in a sealed air-tight container like a small ziploc bag or tupperware. Some people like to freeze it in ice-cube trays, I did it once and it didn’t work well, but feel free to try it. Once it is thawed it should not be re-frozen.

    Naptime Notes

    Naptime Recipe Serving ideas

    This is a basic pesto recipe that never fails and is extremely versatile. Sometimes I stir it into pasta salads or make a light pesto salad dressing, other times I like to use it as a sandwich spread or a dip with veggies.

    Naptime Stopwatch

    I am able to make a large batch of this pesto in less than 10 minutes. Take your time to make sure everything is combined well, this will make it most flavorful.

    Naptime Reviews

    Everyone loves a good pesto recipe and this one never disappoints. Once I added a little jalapeno for spice and everyone liked that, too!

    June 2, 2009

    Coq a la Biere (Chicken in Beer)

    I have two degrees, a B.A. in Psychology and a PhD in Belgian Studies. I earned my B.A. the traditional way, four years of courses, capped off with a 100-page senior thesis. My PhD, however, is a different story. During summers in college I was an intern for Vanberg & DeWulf, the premiere Belgian beer importing company in the US. My job responsibilities were the typical unglamorous intern tasks, I sealed envelopes, organized food events, filed press clippings and did essentially anything else they asked of me. I didn’t mind though, my time working for Wendy and Don was an unparalleled learning experience, akin to having a private tourguide to the cuisine and culture of Belgium.

    In the two summers, and several school vacations, I worked at V&DeW I learned all about the fantastic world of mussels and frites, real waffles, Axel Vervoordt, artisanal cheeses and chocolates, Tin-Tin, and, of course, Belgian-style home cooking. In fact, my first day of work Wendy handed me a copy of Ruth’s book, Everybody Eats Well in Belgium, and my parent’s and I cooked from it, exclusively, for two months straight. The whole experience was a little strange for me at first, having listened to everyone wax poetic about France and it’s culinary treasures I couldn’t figure out what was wrong with Belgium. I mean, why had I never heard much about this country? Did it want to be ignored? It turns out that the country of Belgium is just very small which is why people seem to have an easier job dismissing it then, say, Italy or Spain. But, I can attest, Belgium is packed with cultural treasures and talented people, it deserves it’s share of the spotlight.


    There are many delectable Belgian recipes and anecdotes I plan to share with you over time (Beer battered onion rings! Beef Carbonnade! Artisanal Beers!), but today I am going to start with one of my family’s favorites, Coq a la Biere. This recipe is Belgium’s answer to France’s popular dish Coq au vin, and is perfect to make for a Sunday dinner. The preparation takes time, but is simple and doesn’t require any complicated techniques. One of the biggest ways I save time is to have my butcher (“you have to know your butcher!”), cut the chicken into eight pieces since I hate doing it at home. Once I begin the process of making the dish it simply becomes a matter of slowly adding the ingredients, deglazing the pan, and then letting everything simmer away in dark beer with a fragrant bouquet garni. After almost an hour of simmering the chicken becomes moist and tender, and the beer transforms into a delicious nutty flavored sauce. The finishing touch of the meal is to add a quick dash of cream to the beer sauce, which I serve spooned over the chicken alongside a big green salad. Most of the time the leftovers from this meal will feed my family for at least two or three days, though sometimes I snag the drumsticks during the day and take them to the park for a picnic.


    For my next round of Belgian stories I will definitely go into more detail about Belgium’s beer culture and, of course, share more recipes. I also can’t wait to explore the fascinating experiment by the city of Ghent to go vegetarian once a week in an attempt to lose weight and save the planet. But, until then, I encourage you to research this fantastic country yourself and maybe even plan a trip. There is so much to love about it that Arthur Frommer himself wrote a book called “A Masterpiece called Belgium,” which, I think, says it all. Genieten!

    Recipe

    Naptime’s Coq a la Biere

    adapted from The Beer Companion by Michael Jackson (the food expert, not the singer!)

    Ingredients

    3 T. olive oil
    ¼ stick of unsalted butter
    ½ lb. pearl onions, frozen
    1 chicken cut into eight pieces
    1/3 c. white wine
    1 T. flour
    1 1/3 c. dark beer (I recommend Witkap Dubbele, Moinette or St. Amand)
    Bouquet Garni* (I use fresh rosemary, fresh thyme and a bay leaf)
    1/3 c. heavy cream
    Salt & Pepper to taste
    *To make a bouquet garni tie together 4 inch stalks of any herb you choose with kitchen twine. Then, drop it into your soup or stock to add delicious flavoring. Don’t panic, the herbs will loosen up and float into the sauce, this is normal.

    Instructions

    1. Heat the oil and butter in a large dutch oven. Saute the onions until they begin to brown, the remove them with a slotted spoon and reserve for later.
    2. Add the chicken pieces to the pan and brown each piece. Once they are all browned add the wine and deglaze the pan, making sure to scrape up all the brown bits.
    3. Sprinkle the flour over the chicken and cook for 2 minutes, stirring constantly.
    4. Return the onions to the pan, add the beer, bouquet garni, salt and pepper and bring to a boil. Reduce heat to simmer, and cover for 40-45 minutes until chicken is tender.
    5. Discard bouquet garni, skim excess fat and stir in the heavy cream. Bring back to a boil for 3 minutes, add more salt & pepper to taste.
    6. Serve the chicken and spoon sauce over each piece.

    Naptime Notes

    Naptime Recipe Serving ideas

    This recipe is the perfect meal for big family dinner. It is easy to make and yields large quantities of moist, tender chicken. Feel free to adjust the seasonings if you like, almost any kind of herb works well. I have also heard that people like to serve it with chopped parsley scattered over the top.

    Naptime Stopwatch

    The preparation of the chicken takes about 15 minutes and the simmering about another 45. The whole dinner is complete in about an hour and a half, but time is saved because you don’t have to cook at all the next evening!

    Naptime Reviews

    My husband and I love this dish. My daughter likes the tender chicken but made it abundantly clear to us that she does not like the onions!

    More Naptime Recipes