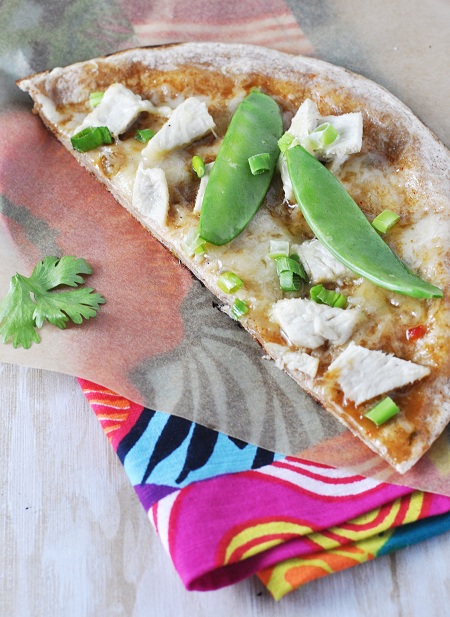
Today my friend Jen from Savoring the Thyme is sharing her awesome recipe for spring pizza. I love her inspiring blog because it focuses on health and wellness and her recipes are awesome. She is a busy mother of two yet manages to make fitness, cooking, and general well-being look so simple when we all know that it is not! hope you enjoy her tips for making awesome Thai pizza. It is healthy, easy to make, and over the top delicious.
Pizza is an American staple: We all love it, crave it, and we over-indulge in it. But considering the average mozzarella pizza is loaded with high sugar sauce, too much cheese and extra grease, is it possible to ever consider pizza a healthy-ish option? Follow some of these tips and you might be proud to serve it once a week.
* Start off with or incorporate a salad while you are waiting for the pizza to bake. In our home, the kids must eat a salad before or after their first piece of pizza.
* Use whole wheat or whole grain pizza crust/dough. You can usually find premade shells or uncooked dough at your local grocery store and bake it yourself or even consider making one yourself thus ensuring no preservatives.
*Make your own marinara sauce or use a high-quality brand.
*Load up the veggies: Tomatoes, olives, mushrooms, cauliflower, peppers, onions (try ëem caramelized), eggplant, corn, sweet potato, and carrots are some great options that add vital nutrients. Also, consider roasting the vegetables for a whole new taste profile. One of our favorites is a Roasted Butternut Squash & Pesto Flatbread Pizza.
*Protein options: Top with some chicken, turkey, shrimp, low-sodium ham, and ground bison are great choices. One of my favorites is Grilled Turkey Thai Pizza.
*Use your greens: Donít be afraid to toss some arugula, spinach, or your favorite herbs on to the pie just before you chow down.
*Low-fat cheeses: Experiment with reduced fat versions of different cheeses such as asiago or feta and only use a small amount. You can also use the standard mozzarella but simply scatter on a light layer as it will distribute as it melts.
*Size DOES matter: Try using small tortillas or pitas for a satisfying but smaller-sized pizza.
*Don’t forget the fruit: Think Hawaiian pizza (pineapple), peaches, and plums. Oh yum!
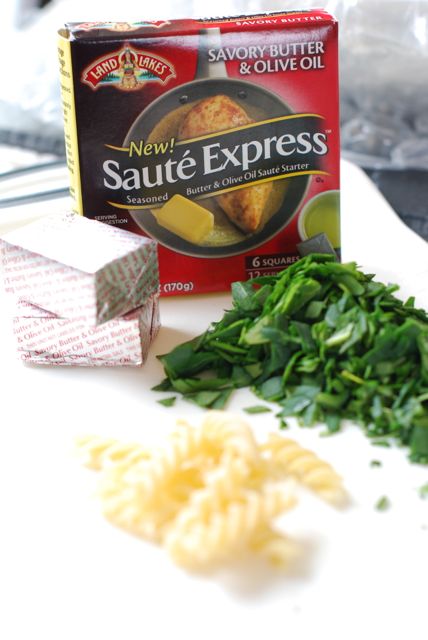
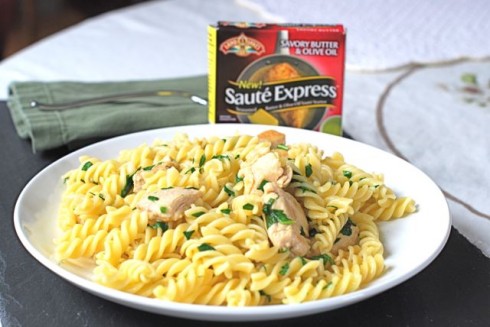
One of the most frequent recipe requests I get from parents is for something new to please their picky eaters. The parents are usually tired of serving chicken fingers and oven pizzas and want to feed their children something wholesome, delicious, and above and beyond everyday children’s fare. My answer is usually to combine vegetables, a lean protein, and pasta and coat it all in a light palate-pleasing sauce. I created something just like this last weekend when I was experimenting with the new Sauté Express® Sauté Starter from Land O’Lakes.
Today, I’m thrilled to announce that I’ll be participating in the Weeknight Wins Blogger Challenge by Land O’Lakes Sauté Express® Sauté Starter.During April, four other lovely food bloggers and Iwill be sharing our weeknight go-to recipes with you. On busy weeknights, many families have just 30 minutes or less to get a wholesome dinner on the table. This challenge should give us all some great, delicious meal ideas to whip up in a hurry. Together, we can score little wins in the kitchen! (Follow along on the Weeknight Wins Pinterest Board.)
Sauté Express® Sauté Starteris this cool new first-of-its-kind seasoned butter and olive oil sauté starter that comes in convenient squares and can be used to cook and season any protein, such as chicken, fish, or pork in one easy step.
They are perfect for cooking and flavoring meats and poultry that can then be used as the base for a light pasta sauce. I usually am happy to toss together my own seasonings from scratch but it is so nice to have these on hand in a pinch. They take the guesswork out of measuring ingredients and save a ton of time!
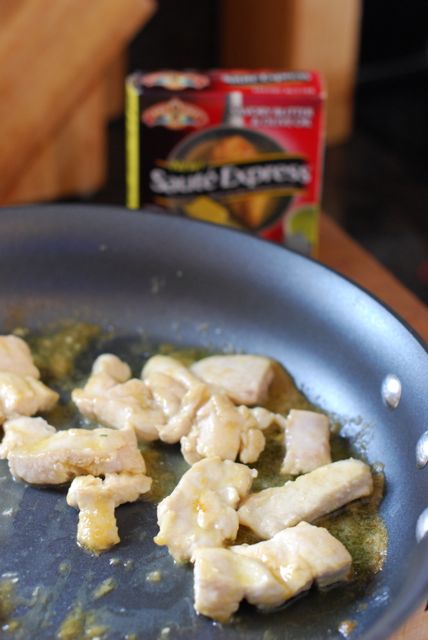
Back to the challenge! The first week’s challenge is “Please Your Picky Eater,” something that many moms and dads will identify with! For this picky eater–pleasing dish I simply sautéed some lean chicken breasts in the melted Savory Butter & Olive Oil square.
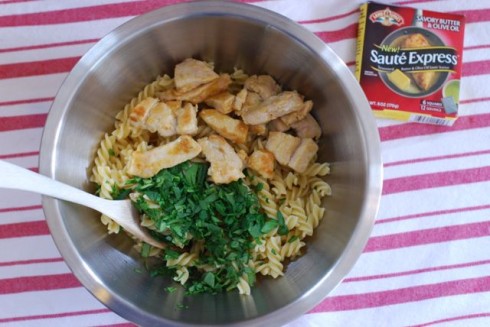
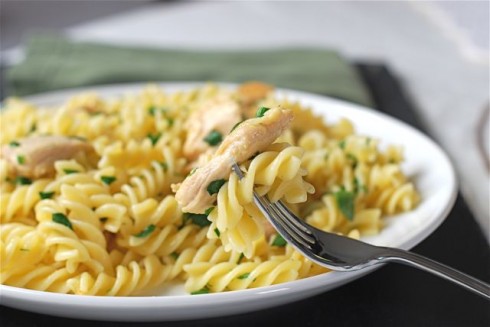
When the chicken was cooked I scraped all of it, including the melted butter, into a bowl with spiral pasta (my daughter’s favorite), wilted spinach, and a pinch of Parmesan and tossed the ingredients together. It was perfection!
Our favorite part about this meal is that it is sophisticated enough for the adults but simple enough for the kids. My daughter, not exactly a spinach enthusiast, eagerly devoured her plateful.
Now, it’s your turn to participate in Weeknight Wins. Each week I’ll be sharing a new recipe featuring Sauté Express® Sauté Starter and hosting an awesome sweepstakes for you!
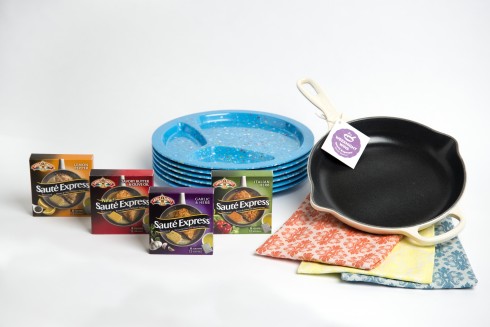
This week’s prize pack includes:
Four coupons for Sauté Express® Sauté Starter
Le Creuset Cast Iron Skillet
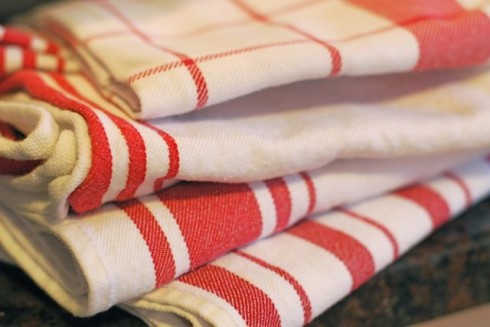
Three hand towels
Set of six divided dinner plates
Now, share your idea for Pleasing Picky Eaters for a chance to win the Sauté Express® Sauté Starter Picky Eater Prize Pack. Bonus: Tell me what you would make using Sauté Express® Sauté Starter to Please Your Picky Eater. Each week, Land O’Lakes will also pick a few of favorites, which will be featured on Land O’Lakes Weeknight Meals Pinterest Board. *When you enter, Land O’Lakes may select your comment to feature for promotion, social media and/or other related marketing materials.
Here’s how to enter–> Simply leave a comment below answering one of the following questions:
What is your weeknight win to please a picky eater?
OR
What would you make with Sauté Express® Sauté Starter?
Enter The Weeknight Wins by Sauté Express® Sauté Starter Sweepstakes
Details Open to legal U.S. residents 18 years and older. No purchase necessary to enter or win. One entry per person (that includes email address & IP address) per day. Required information is first & last name and valid email address. Entries obtained by mechanical or spamming mechanisms will be disqualified. One winner will be chosen at random from all of the qualified entries submitted. Sweepstakes ends on Friday, April 5, 2013 at 11:59 PM EST. Winner will be contacted via email supplied in the entry & will have 48 hours to respond or another winner will be chosen. Approximate retail value of prize: $150 Sweepstakes is sponsored by Land O’Lakes. The Naptime Chef and the sponsor reserve the right to cancel the sweepstakes at any time. Contact The Naptime Chef for winner list or with any questions. By participating in this Sweepstakes, you agree to be bound by these rules and the decisions of the Sponsors, which shall be final. All federal, state, and local laws apply; void where prohibited.
Disclosure: I’ve partnered with Land O’Lakes for an exclusive endorsement of Sauté Express® Sauté Starter. This blog post is sponsored by Land O’Lakes. All opinions are my own.
2 boneless skinless chicken breasts, cut into 2-inch strips
1 cup baby spinach, finely chopped
1 tablespoon Parmesan cheese
Instructions
Directions
Cook the pasta according to directions and drain well. Reserve about 1 cup of the pasta water.
In a large non-stick skillet melt the Sauté Express® Sauté Starter over medium-low. Then, add the chicken strips and cook them on both sides until just cooked through and lightly browned on the outside, about 8 to 10 minutes.
Place the pasta and spinach in a large bowl and pour in the chicken and melted butter from the pan. Then, add the Parmesan cheese and pour in a very small amount of pasta water. Then use a wooden spoon to toss everything together. Add a little more pasta water if necessary. Serve!
Over the weekend I am pretty sure everyone in Connecticut turned off the heat, threw open the windows, and breathed a deep sigh of relief. The thermometer eeked north of 50 degrees F for the first time in five months! Naturally, the minute I felt the rush of spring I indulged in some long overdue spring cleaning. Nothing too wild, just the usual rummaging through closets, cleaning out cupboards, etc. It felt so good to get rid of the dead weight and haul a few bags over to Goodwill! Since I know a lot of you are probably in the same boat – spring cleaning like mad people, relishing the chance to start the season anew – today I am sharing my top ten tips for preparing your kitchen for spring and summer. If you see anything I am missing, please let me know!
1) Deep Clean Cupboards: The first place I start are my kitchen cupboards. I go through each one and wipe it down with a kitchen towel. I also pick through the odd glasses and whatnot we’ve collected over the winter. Little things like token kids cups from birthday parties and to-go mugs with missing lids take up a lot of space and are immediately discarded. I am ruthless as I clean, tossing anything that doesn’t suit our needs.
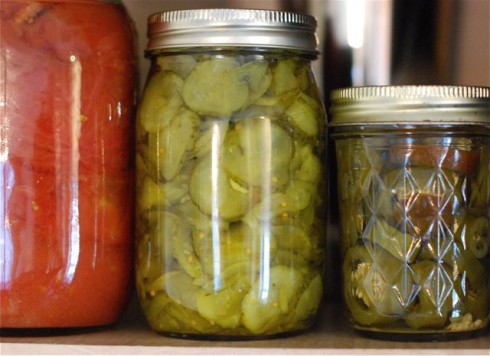
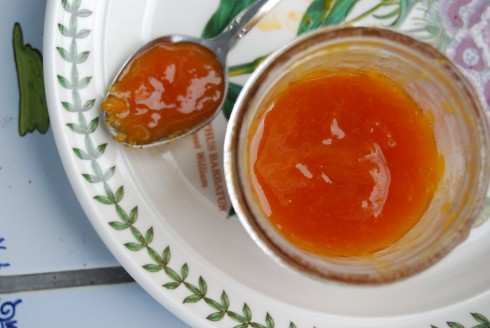
2) Check Expiration Dates: In the pantry the first thing I check are the expiration dates on canned goods. I am not a hoarder, but I am a sucker for gorgeous looking packaged food that I may or may not end up eating. Some items end up sitting on our shelves for years! Anything that is expired, or just appears kind of limp or dead, I chuck. I also check all the expiration dates on the sauces and jams in the fridge. Once the outdated food has been disposed of I wash the jam jars in the dishwasher and save them for arts and crafts projects.
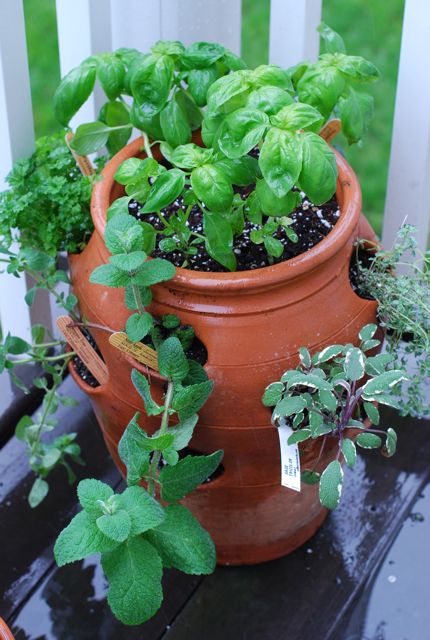
3) Make list of herbs for summer garden: Planting my back deck container garden is something I look forward to every spring. I love selecting the herbs and plants to grow and recipes to make with them. All winter I was dreaming about lemon verbena, for example, and am dying to try it in a new scone recipe I’ve been testing! In April I make a list of the herbs and plants I want and keep an eye out for them at our local nursery. We will plant them in May.
4) Stock up on canning supplies: Woot! I love canning season. I can’t wait to relish the flavors of summer and preserve as much as it as possible for next winter. This is the perfect time of year to reunite jars with errant lids and assess how many full sets of jars/lids/rims you have on hand. If, like me, you gave away a lot of jam last year there is a good chance you’ll need to restock your canning pantry. Put that on your list for April so you can get any shape or size jar you want before they run out. (I am coveting these awesome Blue Ball Jars this spring – I need a case or two! Can you imagine how pretty they’d look with apricot jam inside and packaged up as a gift??!)
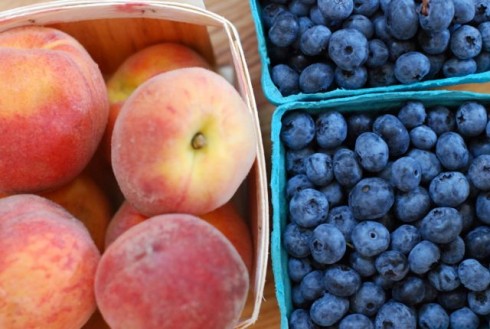
5) Check spring hours for your Farmer’s Market/CSA/U-Pick: We source most of our summer produce outside the supermarket. April is a great month to start looking up the times and locations of farmer’s market. Summer hours and locations can differ greatly depending on where you live! This is also time to research local CSA’s and U-Pick farms. Crops will be in bloom before you know it and you’ll want to be prepared!
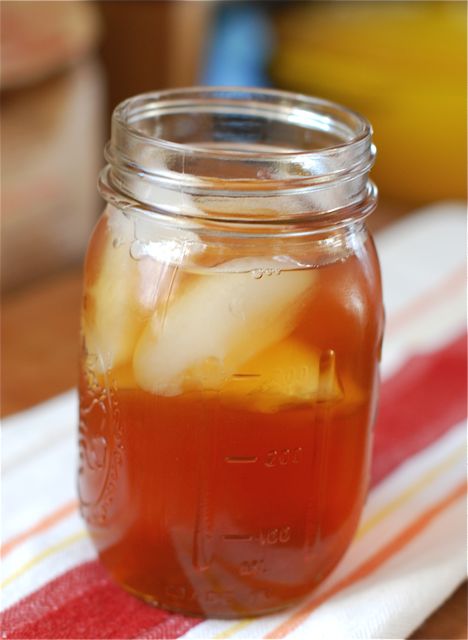
6) Fresh containers for food:I am a big fan of glass pitchers and food containers. During the winter food containers can get dirty with tomato sauce and other food stains. I always stash my iced tea pitcher in a closet and it gets sooo dusty! Now is a great time to pull everything out and give it a once over. If it is terribly stained then toss it! Stick your glass products in a heavy duty dish washer cycle to spiff them up. There is nothing better than a glistening clear glass pitcher for the first batch of Roasted Peach Iced Tea.
7) Tally the fun equipment: In the summer I like to have our popsicle sticks, summer cookie cutters, and ice cream maker at the ready. I consider this our fun equipment since we use it all summer long for our foodie craft projects. Every winter it seems a little elf swipes a few cookie cutters and popsicle sticks so I have to buy some new ones. Most of these items begin appearing in stores this month making it the best time to stock-up.
8) Wipe out coolers and beach bags: We do a lot of picnics in the summer which means I am constantly carrying food to and fro. I usually use a freezer bag or heavy canvas tote bag to haul stuff around and they can get dirty. Each spring I wipe everything down with a heavy soap and water solution and let it air dry on the deck.
9) Kitchen linens: During the winter we tend to eat heavier foods which always seem to stain our linens. This month I will ruthlessly edit our linen collection and toss anything with a stain I can’t get out on my own. Each year I usually lose about five dish towels, a half dozen cloth napkins, and a table cloth or two. Nothing that can’t be replaced. In fact, I kind of look forward to this because it gives me the excuse to pick up a few new pretty things for the summer kitchen!
10) Sharpen Knives: Sharpening your knives seasonally is a good idea. I take our knives to a local kitchen store and they sharpen my whole set for $16. Such a bargain! I also sharpen them at home from time to time, but nothing beats the professional touch. I love having my knives especially sharp in the summer because the produce requires a lot of skinning and chopping. Using a sharp blade on things like tomatoes or eggplant definitely reduces the risk of knife slippage and subsequent stitches!
Two weeks ago I shared my trip to our neighborhood crepe truck as part of my year of exploring street food as a flavor correspondent for Sargento. (If there is a truck you think I should see please let me know!) This program features myself and a few other food bloggers as we spend the year exploring the top 10 food trends of 2013 as identified by Rick Bayless. I was bummed I couldn’t go to the program kick-off at the headquarters in Wisconsin in early February, but I had just had a baby so that was impossible! Instead, I joined the conference via Google + hangout and enjoyed Rick’s talk about food trends remotely.
At that talk each blogger was assigned two specific food trends to explore this year. I was assigned food trucks/street food, as you know, and mushrooms. Two of my favorite things! I felt very lucky. The remaining food trends were also cool and I can’t wait to see what my fellow correspondents write. They include: middle eastern foods, Peruvian foods, habanero peppers, tacos, fermented foods, braising meats, greens, and herbs in desserts.
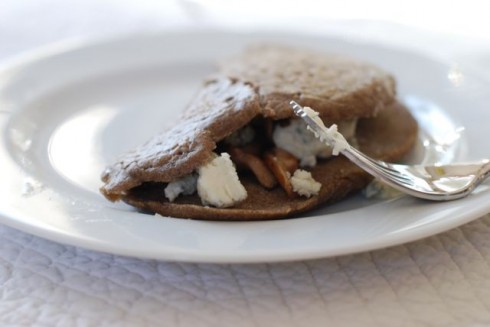
I kicked off my flavor correspondence with food trucks last week, so today I want to talk about my other assignment: mushrooms. I usually buy basic crimini mushrooms for my everyday mushroom-based dishes. But this year I want to explore lesser known varieties and show everyone how we can use them to add more flavor and flair to our everyday dishes. Since we had just recently visited the food truck, where I enjoyed a savory crepe, I thought it would be fun to make my own savory mushroom crepes at home.
Since I was making our crepes for dinner I wanted to make sure they were substantial enough to hold us for the evening. I decided to use blue cheese, mushrooms, and walnuts. In keeping with my pledge to stay away from the common cremini, we elected to use shitake mushrooms for their strong smokey flavor and firm texture.
As with any good powernap recipe, the batter for the crepes came together in a snap and they were easy to cook up on the stove top. To fill them I added in the stewed shitake mushrooms, crumbled blue cheese, and chopped toasted walnuts. Then I folded up the crepe like an envelope and dinner was served! The crepe was certainly rich to boot, but we loved the contrast of the earthy mushrooms with the sharp cheese. The walnuts added a nice amount of crunch without overpowering the palate. It was a deliciously fun dinner for an early spring evening. We also all agreed that this easy recipe would be great for lunch, or even for taking to school for lunch wrapped in foil. Looks like there will be many more crepes in our future this spring!
(This post is sponsored by Sargento. Thank you so much for supporting the sponsors that make The Naptime Chef possible.)
Recipe
Savory Mushroom Blue Cheese & Walnut Crepe
makes 2 large crepes
Ingredients
For the Crepes:
4
tablespoons unsalted butter, melted, plus more for the pan
¾
cup buckwheat flour
¼
cup all-purpose flour
1 ¾
cup milk
3
large eggs
¼
teaspoon kosher salt
For the Filling:
1
cup crumbled blue cheese
½
cup toasted walnuts, coarsely chopped
2
cups shitake mushrooms
Instructions
1. To make the crepes: Pour the butter, flours, milk, eggs, and salt into a blender and puree until smooth. Pour the batter into a container and refrigerate for at least 2 hours or up to overnight.
2. Place an 8-inch skillet on the stovetop and add lightly coat with butter. Warm it to medium heat and 1/3 cup of the batter. Swirl it around the pan and allow it to cook for three minutes. Then gently lift it with a rubber spatula and flip it over. Allow it to cook for one more minute. Repeat this process until all of the batter is used up.
3. To make the two savory crepes: add the mushrooms to the skillet in which you made the crepes and stew in ½ tablespoon of butter. Once the mushrooms are softened and dark brown remove the pan from the heat.
4. Assemble the crepes by dividing the blue cheese and walnuts evenly amongst two crepes. Then top each with even amounts of mushrooms. Fold the crepes in half and serve!
Naptime Notes
Naptime Recipe Serving ideas
Use the remaining crepes to serve dessert. Fill it with fruit, nutella, chocolate, or all of the above!
Naptime Stopwatch
20 minute prep time, 20 minutes cook time
Naptime Reviews
A basic crepes is always a delicious ways to start a meal!
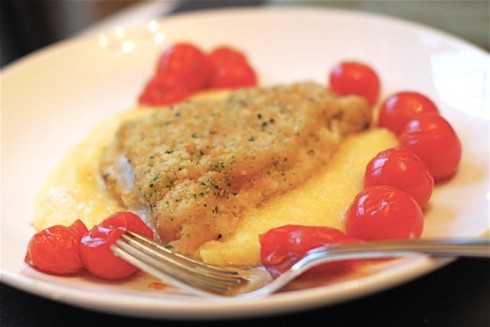
With Easter just around the corner I am wrapping up my Friday fish meals for Lent with Sea Cuisine. I’ll admit, I will not stop eating all the awesome things I’ve been writing about just because Easter has arrived. The Sea Cuisine fish is so good and is such a wonderful way to get a healthy seafood meal on the table any night of the week! For this week’s meal I went back to our favorite Herbed Cod and served it over some fresh Parmesan Polenta topped with roasted tomatoes. It was a simple weeknight meal that was a huge hit with everyone.
While adding roasted tomatoes to our meal may seem a tad labor intensive for a weeknight here is what I did: I roasted them in the same pan as the baking fish. So easy! I simply used a large baker for the Sea Cuisine Cod and scattered the tomatoes tossed with olive oil all around it. As the fish baked the tomatoes roasted and wilted to perfection. While everything was in the oven I stirred together the polenta and had it ready by the time the fish and tomatoes were complete. In the end I only dirtied two pans and dinner was on the table in the snap. Is there any better way to prepare seafood on a weeknight? I can’t think of it! Happy Easter weekend!
Recipe
Herbed Cod with Polenta and Roasted Tomatoes
Ingredients
2
Sea Cuisine Herbed Cod fillets
1
cup cherry tomatoes
4 t
ablespoons unsalted butter
¼ c.
olive oil
1
clove garlic, minced
3 c.
chicken stock
4 c.
milk
2 c.
Polenta
1
cup freshly grated Parmesan cheese
Instructions
1. Preheat the oven to 375 degrees F. Lightly coat the large baking dish with olive oil and place the fillets in it. Then, scatter the tomatoes around the fillets and roll them in the oil so they are completely coated. Bake for 30 minutes, or until the fish is cooked through and the tomatoes are roasted and wilted.
2. For the Polenta: Place butter and olive oil in a saucepan over medium heat. Allow butter to melt fully and stir in the olive oil. Add the garlic and stir for 2 minutes.
3. Add chicken stock and milk and slowly bring to a boil over medium heat. Once mixture is boiling sprinkle in 2 cups of polenta, whisking constantly to make sure no clumps form. Then, switch to a wooden spoon and stir until mixture is thickened like the dense porridge. About 8-10 minutes.
4. Remove the mixture from the heat and stir in the cheese. Once the mixture is smooth divide amongst the dinner plates. There will be leftovers! Spread the leftover polenta in a baking dish and cover with plastic wrap. Then, allow it to cool and refrigerate overnight. Cut into square and reheat the next day.
5. Serve the hot fish on the polenta and scatter the tomatoes on top. Enjoy!
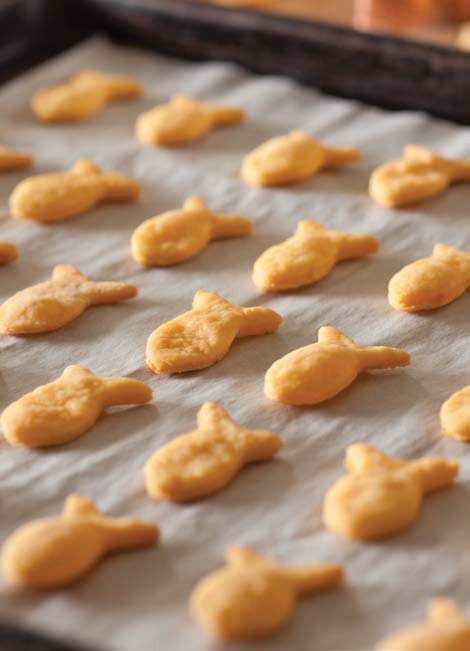
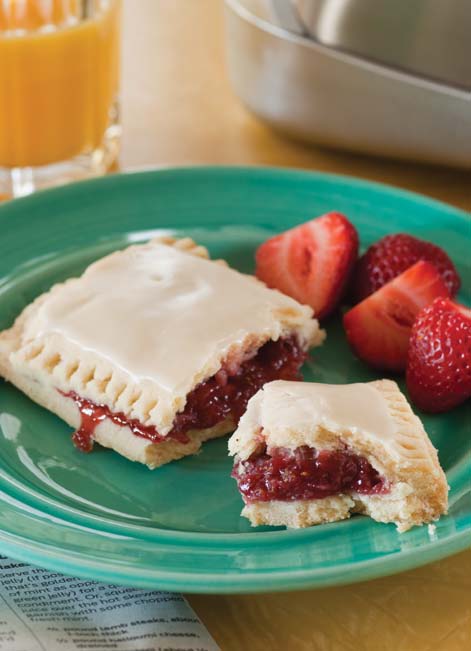
For some reason I always equate Easter with lemon flavored desserts. It is something about the bright citrus flavor that seems to signal the return of spring (we hope) and refresh my palate after a long winter of rich chocolate lava cakes. With the holiday coming up this weekend I decided to make a simple lemon treat to serve following our Easter feast. Just recently my son has started getting on a semi-predictable schedule which is enabling me to get back to naptime cooking. His naps aren’t super long, however, so I have to be smart about what I tackle and a simple cookie recipe seemed like the perfect place to start.
The best part about this simple shortbread is that the buttery coconut dough came together in minutes. After that I was able to roll it out and cut the shapes we wanted with our spring shaped cookie cutters – all while he was napping! He woke up while the cookies were baking so I let them cool on racks for the better part of the afternoon. The cookies, a rich delicate shortbread, were delicious on their own. However, I really wanted something bright and lemony to compliment the sweet coconut flavor. It only took a few minutes to whip up the fluffy buttercream frosting which I flavored with fresh squeezed lemon juice and zest. I immediately spread generous swathes of it on top of each cookie and my daughter added her own personal touch – sprinkles! We set aside half the batch for Easter this weekend. The rest are history!
Recipe
Coconut Shortbread with Fluffy Lemon Buttercream
makes about 24 3-inch cookies
Ingredients
3
sticks unsalted butter, room temperature
1
cup confectioners’ sugar
1
teaspoon vanilla extract
3
cups all-purpose flour
1
teaspoon kosher salt
1
cup sweetened coconut flakes
For the frosting:
1
stick (8 tablespoons) unsalted butter, room temperature
3
cups confectioners’ sugar
2
teaspoons freshly squeezed lemon juice
1
teaspoon lemon zest
1
teaspoon or more water as needed
1
drop yellow food paste
Instructions
1. Preheat the oven to 325 degrees F.
2. In a stand mixer beat the butter and confectioners sugar together until light and fluffy. Then, mix in the vanilla extract. With the mixer on low add the flour, salt, and coconut flakes and beat until everything is just combined.
3. Turn the dough out onto a flour surface and use a rolling pin to roll it out to 1/8-inch thickness. Then, use your cookie cutters to make as many shapes as you would like, re-rolling the dough as necessary. If the dough sticks to your rolling pin simply add a little bit of flour to the surface.
4. Place the cookies 1-inch apart on the cookie sheet and bake for 20-22 minutes, or until lightly browned around the edges. Then allow to cool completely before frosting.
5. To make the frosting: Beat the butter, confectioners’ sugar, lemon juice, zest, water, and food paste together with a hand mixer. If the frosting is too thick simply add more water 1 teaspoon at a time until the desired consistency is reach. Spread thick swaths of frosting on each cookie and serve!
Naptime Notes
Naptime Recipe Serving ideas
These cookies can easily be made without coconut flakes and frosting. Or, use large egg shaped cookie cutters and decorate the cookies with sprinkles instead of the buttercream!
Naptime Stopwatch
20 minutes prep time, 20 minutes bake time
Naptime Reviews
This bright citrusy cookies are just the thing to ring in spring!
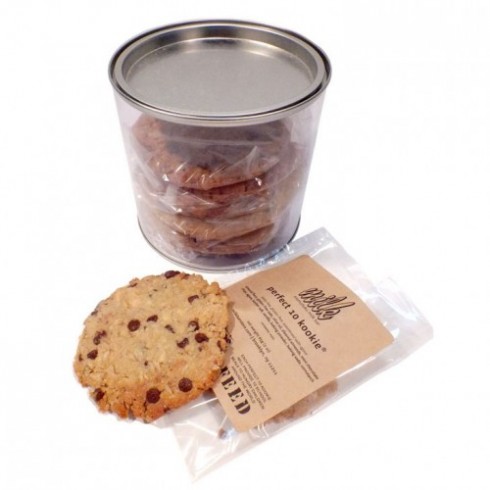
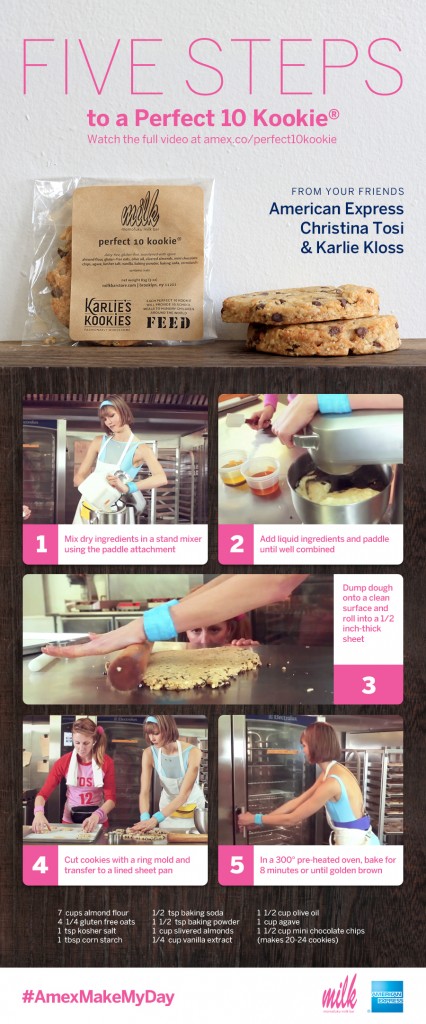
When I heard about The Perfect 10 Kookie – it is gluten-free, dairy-free and sweetened naturally with agave – I thought it sounded really cool. I am a huge cookie addict and any kind of cookie I can enjoy with a little less guilt is a great idea in my book. I have been a long time fan of Christina Tosi and pretty much anything that Momofuko Milk Bar churns out. In fact, that is one of the first places I plan to hit when I achieve my baby weight-loss goal. (Those cereal milk treats are beckoning!)
To create this special cookie Christina partnered with her BFF Karlie Kloss to create a delicious way, guilt-free way to scratch the cookie craving itch at 4pm. They even teamed up to donate 30% of all the proceeds to FEED, a charity dedicated to providing school meals to children around the world. They are doing this as part of the American Express Make My Day experience. This program is dedicated to celebrating cardmembers who are on inspiring journeys (like Christina!) and how paying it forward to readers and AmEx followers around the world.
Today Momofuko Milk Bar is generously giving away 10 Tins of Perfect 10 Kookies to 10 (yes, ten) lucky winners! Here is how to enter:
1) Leave a comment sharing your favorite cookie flavor.
I am doing everything within my power to will spring to arrive. This month we skipped our yearly Charleston sojourn because of the new baby and I miss that first kiss of sunlight and rush of Vitamin D that came with the southern climate. This year I am especially in need of it! To distract myself from the disastrous weather I am starting to cook with any and all of the spring produce I can get my hands on. It is still pretty slim pickin’s at the moment but I’ve managed to find some excellent asparagus and that is a good place to start.
Now that my son is two months old he is beginning to take longer naps that allow me to get back into naptime cooking. Yay! (For a while I thought might need to rename this blog The Sleepless Chef!) This week I used his one hour snooze to assemble this simple asparagus tart and pop it in the oven.
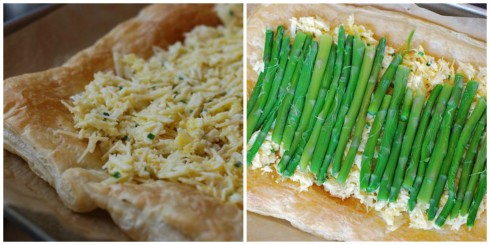
To keep the recipe manageable I used regular frozen puff pastry instead of making a crust for tart pan. I rolled it out, assembled the cooked asparagus, poured the cheese mixture over the top and it was set to be baked! All of this was easily accomplished during his naptime and it was halfway done in the oven by the time we woke up.
This tart is perfect for serving at Easter next week. In fact, we are considering organizing a simple gathering of friends for brunch and this is one of the things that will be on the table for sure. It didn’t exactly bring spring weather with it, but it definitely ushered in the spirit of spring. And that will have to do for now.
Recipe
A Simple Asparagus Cheese Tart for Easter
Ingredients
1
sheet frozen puff pastry, thawed and rolled out to 11×17 rectangle
1
pound asparagus, washed and trimmed
1
cup grated Gruyere cheese
1
cup grated Parmesan cheese
2
large egg yolks
¼
cup light cream
¼
teaspoon kosher salt
1
teaspoon chopped chives
2
ounces crumbled goat cheese
Instructions
1. Preheat the oven to 400 degrees F. Roll out the puff pastry and place it on a baking sheet lined with parchment paper. Prick it all over with a fork and bake it for about 10 minutes, or until lightly golden brown. Remove from the oven and allow to cool.
2. Bring a large pot of water to a boil and cook the trimmed asparagus for about 3 minutes, or until a fork can just spear it and it is bright green in color. Drain the water and run the asparagus under cold water to stop it from cooking.
3. In a large bowl whisk the cheeses, egg yolks, light cream, salt, and chives. Spread this mixture over the pre-baked puff pastry, leaving a 1-inch boarder. Then arrange the asparagus on top of the egg mixture and dot it evenly with crumbles of the goat cheese. Bake the entire thing for about 20 minutes, or until the crust is golden brown and the cheese mixture has puffed up.
4. Allow to cool slightly then serve in squares!
Naptime Notes
Naptime Recipe Serving ideas
This simple asparagus tart is idea for Easter! It would also be nice topped with prosciutto or slices of cooked mushroom.
Naptime Stopwatch
20 minutes prep time, 30 minutes bake time
Naptime Reviews
This easy tart was a huge hit and will be made a lot this spring for entertaining.
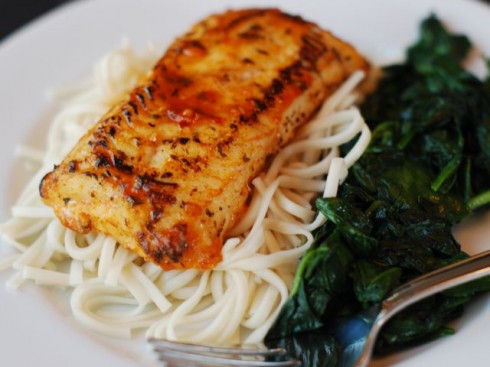
One of things I love about Sea Cuisine frozen fish is that is comes in such a wide variety of flavors. There is everything from Tortilla Crusted Tilapia with firey spices and undertones of lime, to crispy Beer Battered Cod, to this, Asian Spiced Tilapia. This week we were in the mood for Asian cuisine so I selected this fish to serve on a simple bed of udon noodles with a side of spinach. The flavors melded beautifully and we felt like we were eating at a fancy Chinese restaurant instead of in our own kitchen.
As with all of these Sea Cuisine meals, this one came together in under thirty minutes. There is nothing better than that, really, since that is exactly what you want on a busy weeknight. We served it on Friday for our Lent meal and were thrilled with the healthy meal featuring sustainable seafood and organic spinach. It was just what we needed to sit down to after a long, busy week. In fact, we liked it so much I’ve filed this away in my meals in regular rotation. Even though Lent ends next week it doesn’t mean we’ll stop enjoying all these wonderful Sea Cuisine meals!
(This is a sponsored post. Thank you for supporting the sponsors that make Naptime Chef possible).
Recipe
Asian Spiced Tilapia with Udon
serves 4
Ingredients
4 fillets Sea Cuisine Asian Spiced Tilapia
1 package Udon noodles
1 cup baby spinach, coarsely chopped
Instructions
1. Preheat the oven to 375 degrees F. Lightly oil a baking dish and place the fillets in the dish. Bake for 30 minutes, or until cooked through.
2. Meanwhile, on the stove top bring a large pot of salted water to a boil and cook the noodles according to package directions. Then drain them and reserve 1 cup of the cooking water. Return the noodles to the cooking pot and stir in the spinach along with some of the pasta water. Stir until the spinach is wilted and the noodles are not sticking to each other.
3. Divide the noodles evenly amongst each plate and place a fillet on top. Serve!
This week my friend Casey Barber of good.food.stories is joining me to chat about her new book, Classic Snacks Made from Scratch. I mean, who couldn’t love a book like that?!! If I wasn’t concentrating on losing the baby weight I think I might work my way from beginning to end without a second thought. Everything looks delicious and harkens back to those alluring snacks of my childhood.
1) You did an amazing job rounding up all the classic snacks in this book. Were there a lot of these in your house growing up? How did you compile such a list?
Though my parents did their best to keep my sister and I in the realm of Grape-Nuts and whole wheat bread, my grandparents had no such compunction. Their freezer was always stocked with Pudding Pops, their fridge held treasures like three-layered Jell-O… according to family lore, any time I arrived at their house, I declared, “I would like to have something sweet!”
Putting together the list was fun and fairly easy—I brainstormed all my favorite snacks from my youth, asked my friends what their most requested (or most infamous) snacks would be, and combed the aisles of my local grocery stores with a notepad!
2) What do you think is the biggest difference between these classic snacks when they are made in a home kitchen versus the kinds we find on store shelves?
The biggest difference—and this isn’t necessarily a bad difference—is that there is a particular chemical aftertaste that I just couldn’t replicate in some snacks. You know how Twinkies would coat the inside of your mouth with a layer of sickly sweetness? Yeah, I couldn’t make that happen. But the best part about these snacks is that you can completely customize them to your liking. I’ve had people doing Milano cookies in orange as well as mint, people making Twinkie cupcakes; it’s really cool to see how everyone interprets the snacks.
3) How was the process of creating and testing each recipe? I imagine it took a lot of work since people expect these to taste just like the real deal they find at the store! No pressure there… 🙂
The process of creating each recipe started the same way: by buying the processed, packaged version of the snack in question, then dismantling and dissecting each component in my kitchen (pulling apart Oatmeal Crème Pies, cutting open Totino’s pizza rolls) to dial down to the essential flavors and textures of each snack. Sometimes it was easy to figure out that, for example, a Nutter Butter is essentially a frosting-filled peanut butter shortbread cookie, but other recipes took a lot of time. Nailing down the particular wheaty sweetness of a Wheat Thin was a big challenge.
4) Which one of these snacks has a Proustian effect on you? (For me it would be Sno-balls. So completely off limits in our house…oh the memories of buying them at the local five and dime and savoring them in my friend’s treehouse on sticky summer days praying we wouldn’t get caught!)
So funny – Sno-Balls were one of my favorites too, though revisiting them as an adult made me realize just how creepy that outer marshmallow layer is in the way it peels away from the cake inside. It’s just so… ALIEN. Funyuns were a big rediscovery; I have such fond memories of crunching into them while wasting time at the local pool, preferably alongside one of the snack bar’s crispy, buttery grilled cheese sandwiches. I probably should have only purchased a snack-size bag when researching them for the book, but I ended up eating the whole full-size bag in a matter of days. Couldn’t stop!
5) Are there any newer classic snacks you didn’t include in this book? When I shop with my daughter I am amazed at the amount of newer snack foods that have come out since we were kids!
You can probably tell just by looking at the table of contents that I’m a child of the ‘80s. I don’t understand these new snacks; like, when and why did they decide to make Fruit Roll-Ups green or blue? They were perfectly fine in regular fruit colors! Actually, I would have liked to include some even weirder snacks like Fun Fruits (remember those?) and sugar wafers, or drinks like Ecto Cooler in the book, but developing and testing 70 snack recipes was more than enough work.
6) What were some of your favorite moments from the writing and production of this book?
Honestly, some of the best moments were getting feedback from my testers, all of whom were home cooks with varying degrees of skill, and hearing how happy, successful, and empowered they were by trying the recipes. I had people deep-frying, boiling sugar and making marshmallows, tempering and enrobing chocolate, shaping and baking pretzels—all of these things that they’d never tried or thought they could do and they all pulled it off!
7) What is next for you? I vote for a Classic Snacks vol 2!
I don’t think I can put my mind and stomach through the process of recreating any more classic snacks for at least a year—the number of Twinkies I’ve been making for my book events is reinforcing my decision to move away from the snack recipe development for a while! I’m still trying to pin down my next book topic; I love baking as much as I love cooking savory food, so it could be anything.
Images by Judi Swinks. Used with permission.
To Enter to Win A Copy of Classic Snacks Made from Scratch:
1. Leave a comment below sharing your favorite classic snack!
It is hard to believe that my little guy is already two months old. I can now officially say things like “where did the time go?” and “boy, time flies with kids.” I’ll admit, I can hardly remember late January and early February. Many thanks for your patience while I dealt with severe sleep deprivation and adjusting to life with an infant. It was not easy! I know a bunch of my posts were late getting up and there were quite a few typos. Hopefully those days are behind us. You’ve probably also noticed that I have taken on some sponsors this year. They help me keep this site running and I appreciate your support of these posts. I would never agree to a project I didn’t believe in sharing with you!
Luckily, my baby is a great eater and sleeper and spring is shaping up to be more restful. I am glad because I have a book to write (!) I have already started naptime cookinga little bit and will be doing it more and more as our schedule straightens out. In the mean time, here are some of my favorite things from around the web lately. A lot of these I’ve found during my 2am feedings. Turns out that is a good time to surf the internet!
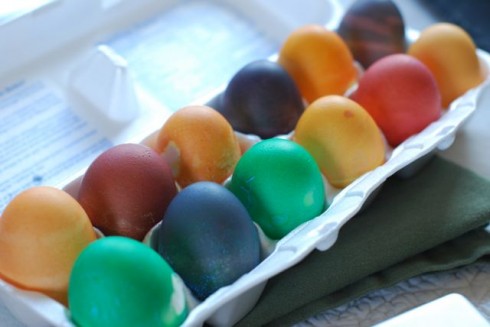
– This week I made these dye baths and dyed Easter eggs with my daughter and her friend.
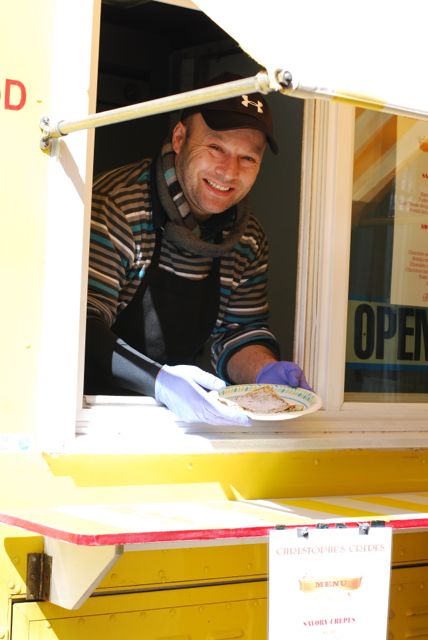
One of the many things I miss about living in New York City are the food trucks. They always served the most delicious cuisines and were the perfect spot for grabbing a quick lunch or dinner. I lived there during the food truck trend explosion and nearly every week an awesome new truck would burst on the scene. By the time we moved out of the city there were hundreds of trucks serving nearly every kind of food on the planet! I was never at a loss for something new to try. Luckily, it hasn’t taken too long for the food truck trend to spread to the suburbs. Our little town in Connecticut even has one food truck, Christophe’s Crepes. Christophe is a jolly frenchman who parks his truck outside our local library. My daughter and I eat there at least once a month. We usually combine it with a trip to return her library books. Here are some shots of our recent trip over the weekend:
Christophe is always smiling. Every time we visit we chat and tells us what ingredients are freshest that day. This week he recommended the pears!
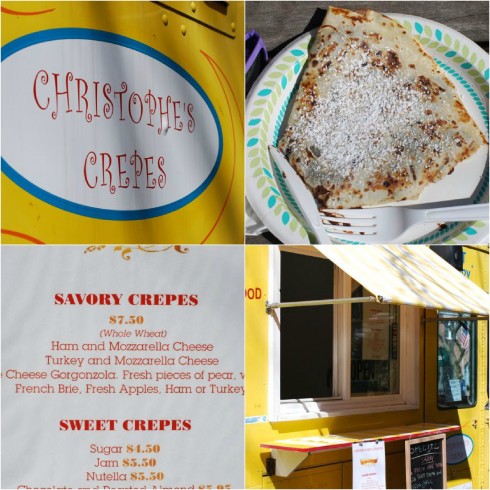
The menu is so extensive. I always debate forever before deciding which one to get!
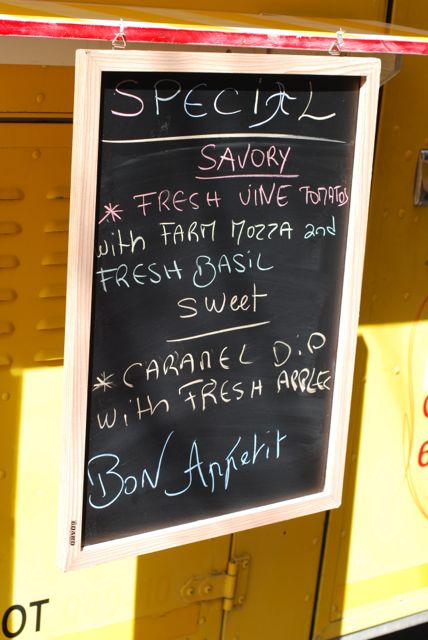
I love that he has a Specials board. Doesn’t a Caprese Crepe sound amazing??!! I think I might try and make one this summer.
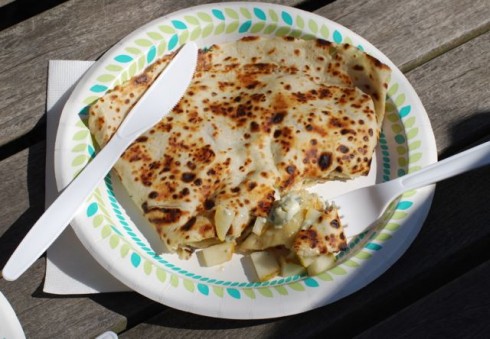
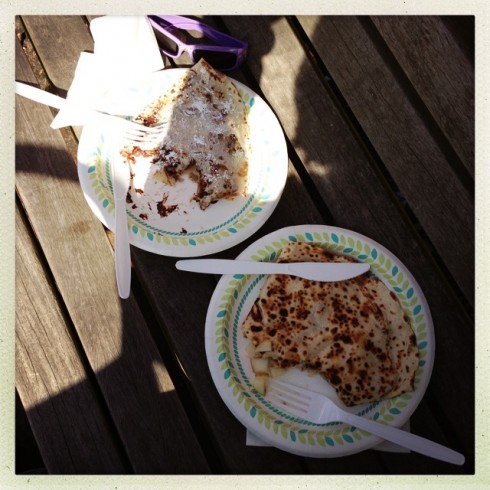
This time I selected the savory crepe with Gorgonzola, Pear, Walnuts & Honey. It was SO good!
My daughter selected the chocolate crepe sprinkled with confectioners’ sugar. Naturally.
As we walked away we discussed what we will order next time. My daughter plans on strawberry and I am hoping for another savory one. I also secretly want to order the caramel apple crepe but am afraid it might set me back too much on the baby weight diet. Oh well. Bon Appetit!
I am so excited to be exploring the food truck trend for the rest of the year on behalf of my partnership Sargento. Do you know of a food truck I should visit? Let me know!
(This is a sponsored post by Sargento. Thank you for supporting the sponsors that make The Naptime Chef possible.)


